Jonathan's Shop

Let me explain a little about this steak. I raise beef, eat my own home grown beef and think it the best. But this little hole in the wall tavern in a little burg cuts its own steaks, tenderizes and cooks them. 3/4" cooks down to about 1/2", 2 pound, full cut steak. I am telling you, cotton candy doesn't melt in your mouth any faster than this steak!! They make onion rings that are delicious. This meal is going to cost for 3 steaks and beverages, dinner salad, onion rings, approximately $114.00 plus tip. But folks, I cannot stress the taste and tenderness of this steak. It is a steak to build a shop for!!!:D:thumb::rofl::rofl:
 
Glad to hear the Reunion was a real joy, and a BIG congratulations on your Windfall to be, of "Free Wood".:clap::clap::clap: That Wormy Chestnut will sure make some nice projects if it looks anything like the Chestnut "Norm" used to make a coffee table on one of his shows.

Glad to hear that you're still on track for the Steak Dinner Too. Sounds like ya'll are really coming along nicely. Sure wish I had a future SIL to help me with mine, (but "IF" I did, he probably wouldn't want to make the 360 mile commute to get here anyhow).:rofl::rofl::rofl::rofl::rofl:
 
Sure wish I had a future SIL to help me with mine, (but "IF" I did, he probably wouldn't want to make the 360 mile commute to get here anyhow).:rofl::rofl::rofl::rofl::rofl:

It's all in the bribe er, desire to be in the family!!! yeah, yeah, that is what it is! Seriously, he is a big hunter. Told him we would take one side and make it a reloading station and put a gun vise there so we can work on our guns in the shop, as well as have a dedicated space to thoroughly clean a gun. He was in!!!!!!
 
Ok no pics youre treading close to the edge.:D Ned where are you when i need you to back me up?

As for cleaning guns man thats is the easiest task i have ever had. Load the spray gun with Afgas ( in the event that this is a non known SA term its actually aeroplane fuel for light aircraft very high octane).

Opps intermediate step...dismantle rifle

Step two, spray the heck out of the rifle and all its mechanism.

Step 3 oil and put back together.

Now just in case you guys are listening at home please dont do this yourself. This was what you call army issue and I am not a professional. ( In the words of the Mythbusters) :rofl::rofl::rofl::rofl::rofl:

Jonathan you had my mouth watering and the drive to your part of the world is looking attractive just to find this Steakhouse.:D:thumb:

Now listen here, Pilgrim, you just have to show a little patience. I reckon Jon gets until the weekend for pics, By then he should have found a minute or two to shoot, in the middle of all the work he has to do. Next week, the guys wit da attitude might get called in if'n-youse_knows_what_I_Mean?
 
last minute thughts jon yu can bring along one them thar steaks fer me to try:) sounds like it migh be tasty ifun i knew yu had good food like that near your place i wouldnt have left and went to mc D;s later...
 
It's about 45 minutes South of us, have to call and make a reservation as they cut their own steaks. Friday's and Saturday's I hear the line is around the corner on the block. We try to go on a Wednesday cause he'll cut and make them then. Sometime, bring Mrs. Larry down, we'll make the reserve and go!!
 
Based on your GPS and map following skills (er lack of skills) the last time you were here, I can understand you not wanting to get to far from your front yard! :rofl::rofl::rofl::rofl::rofl:
Looking forward to the 29th, told Lou the approximate number of people attending this shingding, she said, "I'll make four pies, two of each". I just hope I don't forget them at home! :eek::doh::D:D
 
Okay, you asked for pictures. They aren't my best work. I am not real good at photography, but for some reason, I messed with my camera settings and now it waits forever to take the shot, I get blurry photos, blinding/glossy shots, and I no longer own a manual for this camera. So, if anyone knows good generic settings I should set this on, am game to give it a go. I own an Argus DC-6340 digital camera.

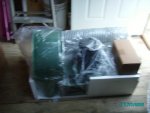
As discussed, last Friday I had a great idea and emailed my brother. He lives in Muncie, Indiana and they have a Harbor Freight store in their city. So he calls them and they have this DC unit for $180.00. Extra box of assorted parts, $50.00. I ask him to bring it and will pay him when he gets it here. Well, here is proof positive it made it!!! Thanks Gene.
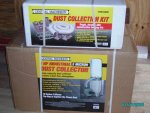
DC I.jpg


I actually set up the lights so I could put it together that night. It wasn't real difficult. Pretty straightforward I thought. Found the picture on the box more informative than the instructions though!:dunno:
DC II.jpg
I thought I had a picture of the completed unit. Not on this SD card!:dunno: Assume you know what it will look like, but will get a shot of it this weekend and get it posted for your entertainment! :D


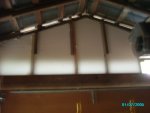
This is a shot of the East wall. This is the wall that faces my house and has the garage door and service door in it. The new header over the garage door is installed and the studs just hanging.
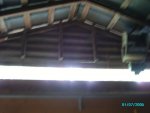
East Wall I.JPG


New studs in place, insulation installed. It is starting to get dark in this shop in day time! :huh: As soon as the ceiling gets installed, a set of flourescent lights are going up. :thumb:
East Wall II.JPG


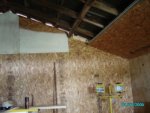
This is the West wall showing the corner sheeted and the center. Used the sheet of OSB that I tested the primer on. Still no peeling!!!:thumb::thumb:
West wall I.jpg


A better shot of the center sheeting. Notice at the far left the stud showing and insulation.
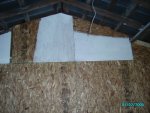
West Wall II.jpg


Now you see the entire West wall has been sheeted from top to bottom!
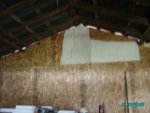
West wall III.jpg


You can see many things in this shot. First, the North wall is all metaled as the last sheet that was missing is in place. Also notice the West wall is metaled up to 9'. Going to lay out the peak metal and cut it and duplicate it at the same time so both ends can be done with minimal ladder climbing and measuring. Also in this shot you can see our custom fabricated corner. I did not want anything that kids or livestock when running by or into, can get cut. We split a shee of tin and rolled it around the corner. Made a very nice addition and looks great in person also!!
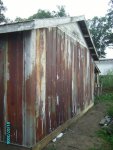
West metal and corner.jpg


And finally, here is the South side of the woodshop. Top to bottom, East to West, all done!
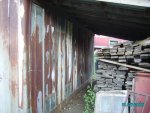
South Metal.jpg


Two more photos on the next post.
 
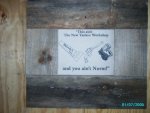
Pete Simmons comes through again!!!!!!! I am telling you, if you have need for laser work, talk with Pete (he is a Family member). Great turn around time, excellent work. Thanks Pete, exactly what I wanted!!!!! :thumb:

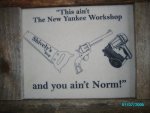
Well, here is my new shop's sign! I love it. Pete did an outstanding job on it. No disrespect intended, just a knock off from a line in Quigley Down Under.
Shop Sign II.jpg


This is a piece of corian, it didn't have a hole drilled in it and I wasn't about to try drilling a hole in it! So, I cut a lap joint since the dado blade is still on the table saw and then attached a piece of plywood behind the corian "pinching" it between the rough sawn 2x6 and plywood. For time being and for safety sake, it is screwed to a stud top and bottom with a pair of 6" deck screws.
Shop Sign I.jpg

Well there you have all the photos off of my camera. The short ceiling on the North side is complete, the South short side ceiling has its first sheet of insulation and OSB attached and second pair on the drywall lift waiting on me for tomorrow evening's instillation. Plan on finishing up this weekend. Need a breather and a weekend to get in and get some wood chunked up and while taking a breather checking for deer sign and trees for deer stands. So, until then, comments, critiques, suggestions appreciated and applauded :)clap:).
Sandblasting, yep, another Harbor Freight future purchase, except I am going to buy the pressurized blaster instead of the gravity flow (really a venturi) flow blaster. But that will be next spring. Sand blasting, good primer, good paint. Might even invest in a decent sprayer. :dunno:
So, until next time, :wave::wave:.
 
Shes'a coming along real GOOD Jonathan.:thumb: I like your shop sign, and I really like the way you wrapped the metal around the outside corners. Looks like you caulked them when you put them up too and that will sure keep a lot of that cold air out that wants to sneak in. I've still got to remove all the metal corner trim they put on my building and spray some of that expanding foam sealer in there, as there are too many gaps that are just a little too wide for plain caulk to do any good.

Congratulations on getting the DC too. Although I have a precut kit to build a Pentz cyclone, And a New Blower fan wheel for a DC1900 Jet to build the Blower, it will probably be a long time yet before I can get to that project, and since I still have a "Cupon" for that same HF DC (for $139.99 + tax), that is good until Dec 21/09, I have sure been thinking about getting one to use in the interim while I'm building the shop cabinets, etc. I don't remember seeing that "Accessory Kit" you got, in our store here, so how many feet of that 4" hose comes in it?
 
Last edited:
youre moving along nicely, looking very nice indeed.
did you get any heating up in there yet, it looked like I saw a heating suspended off the ceiling.

Nope, no heat yet Allen. Am noticing it getting darker and darker so lights after priming and painting the OSB is in order. Oh I know what you saw! The blower I used to use to cool calves. It is still hanging near the peak in the East wall. I am going to have Eric Saturday here helping so thought I would wait to take it down with his help. Then I can finish that last piece of insulation and get it OSB'ed on the East wall.
 
Top