Mike Stafford
Member
- Messages
- 2,933
- Location
- Coastal plain of North Carolina
At long last I have completed my first foray into the making of sheaths for my knives. Let me tell you it is almost an embarrassment to post them in the Leatherwork category. It has been one learning experience for me. I wasted quite a few pieces of leather until I finally figured out how design the sheath to accommodate not only the blade but part of the handle.
Getting the knife to fit snugly into the quiver style sheath was difficult. Accounting for the extra width was hard for me to get right. Also the thin leather my wife bought for me did not work for molding. Molding is the process whereby you soak a completed sheath in water and then stick the carefully plastic wrapped knife into the sheath and mold it to the contours of the blade and handle. I did this on a few knives but the thin leather I was working with did not have enough body to retain the molded shape.
All of my sheaths do incorporate welting which is just another layer of leather that is shaped to match the contour of the knife blade and is glued and sewn into place between the outside pieces. Essentially the welting forms a pocket within the sheath to protect the threads.
Stitching up the leather was an interesting experience as the saddle stitch I was using requires the maker to use two needles at once. Once I got the hang of it I was able to sew up a sheath fairly quickly but it was tough on my hands and many times I had to use pliers to pull the needles through the pre-punched holes. The holes are punched with a leather awl which has a diamond shaped point. The holes are spaced in my sheaths at 4mm apart so even on a relatively small sheath there was a lot of stitching to do. I also back stitched on each end at least 5 stitches to reinforce those areas. The stitch holes lie in grooves that are cut with a groove cutter so that they lie more or less flush with the leather surface. That was more difficult than it sounds in the soft leather I was using.
The edges of the leather are beveled and then rounded over with a rounding tool that is a chisel that rides on the corner of the leather to remove it. Once the corners are rounded I applied an edge coating that sealed the exposed flesh side of the leather to offer some protection and stiffness.
I worked my way into making a few sheaths with belt loops just to learn the process. Future knives with probably all have a sheath with a belt loop.
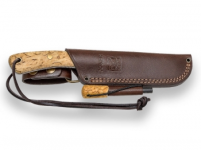
Here are a few of my quiver style sheaths. Nothing fancy but they do protect the knife and the user from the knife's edge.
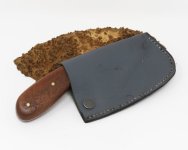
In this sheath and a few others I used a rivet near the opening to tighten it up so the knife would be retained a little better by the sheath.
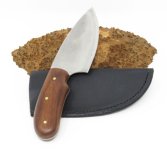
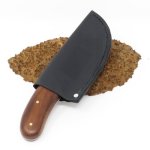
The sheath for this Inuit pattern skinning knife incorporates welting on both edges of the drop point to ensure the blade sits safely in the sheath.
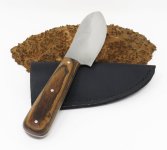
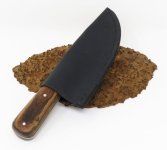
Another sheath where I used a rivet to tighten up the opening so that this skinning knife would fit in the sheath a little more snugly.
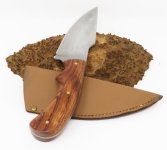
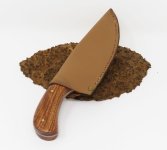
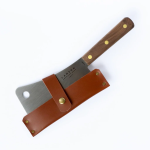
The shape of this little rosewood cleaver required me to shape welting that protected the stitching along the side with the blade edge as well as the end of the sheath. I added a rivet to snug up the opening just a bit.
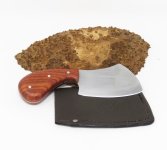
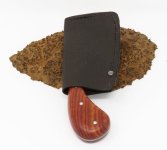
This sheath for the walnut camp knife was one of the best fitting I made. It fit snugly around the portion of the handle that was inserted into the sheath.
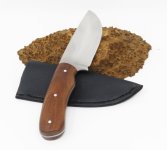
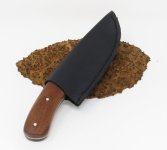
This sheath for the little oak handled skinner fits nice and snug on the handle which securely holds the knife.
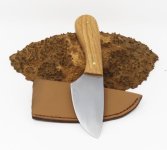
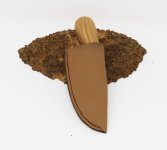
Applying the sealer to outside edges of the leather and welting was an interesting job. The sealer is a mixture of shellac and dye and is quite runny.
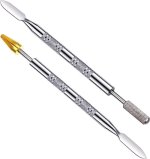
My first attempts were using a wool dauber. This proved to be quite messy. So I ordered a set of tools that incorporate textured rollers that are dipped into the
sealer. The tool is then rolled onto the leather and the sealer is applied in a very controlled manner. I was skeptical of these tools when I ordered them but they worked like a charm.
Getting the knife to fit snugly into the quiver style sheath was difficult. Accounting for the extra width was hard for me to get right. Also the thin leather my wife bought for me did not work for molding. Molding is the process whereby you soak a completed sheath in water and then stick the carefully plastic wrapped knife into the sheath and mold it to the contours of the blade and handle. I did this on a few knives but the thin leather I was working with did not have enough body to retain the molded shape.
All of my sheaths do incorporate welting which is just another layer of leather that is shaped to match the contour of the knife blade and is glued and sewn into place between the outside pieces. Essentially the welting forms a pocket within the sheath to protect the threads.
Stitching up the leather was an interesting experience as the saddle stitch I was using requires the maker to use two needles at once. Once I got the hang of it I was able to sew up a sheath fairly quickly but it was tough on my hands and many times I had to use pliers to pull the needles through the pre-punched holes. The holes are punched with a leather awl which has a diamond shaped point. The holes are spaced in my sheaths at 4mm apart so even on a relatively small sheath there was a lot of stitching to do. I also back stitched on each end at least 5 stitches to reinforce those areas. The stitch holes lie in grooves that are cut with a groove cutter so that they lie more or less flush with the leather surface. That was more difficult than it sounds in the soft leather I was using.
The edges of the leather are beveled and then rounded over with a rounding tool that is a chisel that rides on the corner of the leather to remove it. Once the corners are rounded I applied an edge coating that sealed the exposed flesh side of the leather to offer some protection and stiffness.
I worked my way into making a few sheaths with belt loops just to learn the process. Future knives with probably all have a sheath with a belt loop.
Here are a few of my quiver style sheaths. Nothing fancy but they do protect the knife and the user from the knife's edge.
In this sheath and a few others I used a rivet near the opening to tighten it up so the knife would be retained a little better by the sheath.


The sheath for this Inuit pattern skinning knife incorporates welting on both edges of the drop point to ensure the blade sits safely in the sheath.


Another sheath where I used a rivet to tighten up the opening so that this skinning knife would fit in the sheath a little more snugly.


The shape of this little rosewood cleaver required me to shape welting that protected the stitching along the side with the blade edge as well as the end of the sheath. I added a rivet to snug up the opening just a bit.


This sheath for the walnut camp knife was one of the best fitting I made. It fit snugly around the portion of the handle that was inserted into the sheath.


This sheath for the little oak handled skinner fits nice and snug on the handle which securely holds the knife.


Applying the sealer to outside edges of the leather and welting was an interesting job. The sealer is a mixture of shellac and dye and is quite runny.
My first attempts were using a wool dauber. This proved to be quite messy. So I ordered a set of tools that incorporate textured rollers that are dipped into the
sealer. The tool is then rolled onto the leather and the sealer is applied in a very controlled manner. I was skeptical of these tools when I ordered them but they worked like a charm.

Last edited:

