Al Navas
Member
- Messages
- 147
- Location
- Between St Joseph and Savannah, MO
A WIP - Some of you may have already seen this elsewhere: A changing table and chest-of drawers combo, for a special client - our daughter, who is expecting a new baby. She has no idea that this project is being done; the baby is due in mid-March.
Background:
Our daughter is expecting a new baby, our fifth grandchild. She wanted to buy a new changing table, as her old/cheap one is getting rickety and cannot really be reworked into anything decent. So, I step in and start making this, after LOML asked our daughter to not spend any money she does not have to spend
 . Of course, daughter is unaware of what is happening, or at least she so gives the impression.
Project
Make a new changing table that can later be used as a chest-of-drawers with shelves on the side. Why waste the effort if the changing table would be used only a few months at best?

Design: Based on a Wood Magazine project plan -
1. It must be 42 inches tall, to near elbow height for our daughter.
2. Around 20 inches deep.
3. Around 50 inches long. The top will be attached to allow it to float on the top board, to allow for expansion.
4. Incorporate at least three, and possibly four drawers, around 30 inches wide, on full extensions slides mounted on the sides.
5. Have at least two adjustable shelves.
6. Light color wood, as daughter hates dark woods.
7. The finish should be easily redone, as it is known that some damage will take place. ==>> Waterlox.
8. Use solid wood all the way around. ==>> QS sycamore! Had to order some, to make the drawers - hope it will be here soon... In the meantime, using flat-sawn for the boxes, but the fronts will be QS.
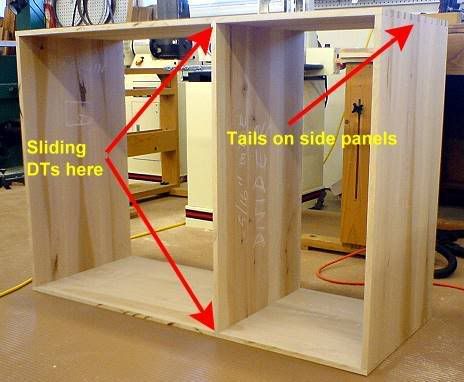
9. Dovetail construction for the main box - tails showing on the side panels; sliding dovetail for the vertical divider.
10. Depending on how well things go, the final dimensions should be close to those given above

 .
.
11. Not shown: Railing, using purchased turned spindles. Still must finalize the design. Will be removed after the baby outgrows the changing table.
Thanks for looking! I will have an update sometime in the near future.
--------------- Al
Carcase construction:
The following photos illustrate the steps I took to get the basic carcass done, with some explanation of the why I did things in a certain way:
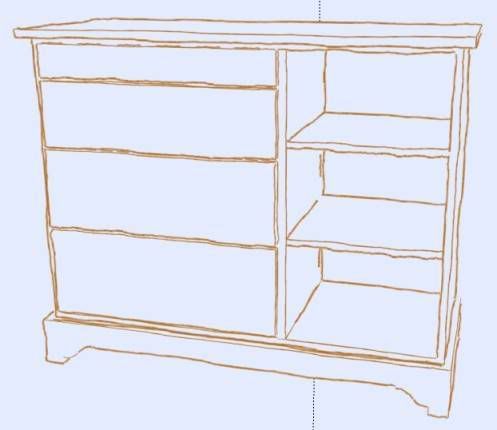
Basic design: SketchUp design, using Sketchy Pen Sepia Style in Google SketchUp 6:
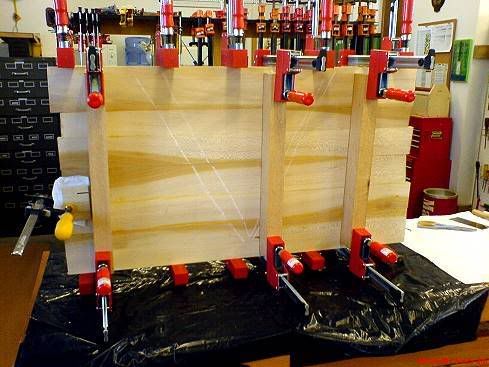
Panel glue-up:
Side panel:
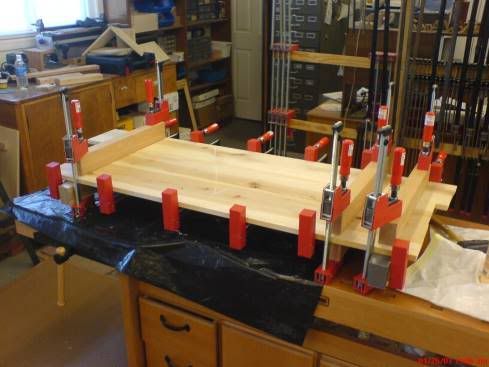
Bottom Panel:
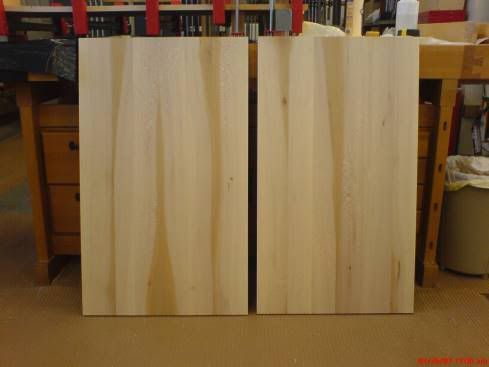
Both side panels trimmed to final size:
I had to raise and really secure the Leigh D4 dovetail jig to accommodate the longer panels:
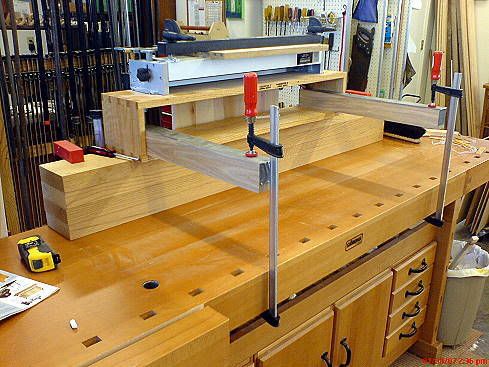
Getting ready to cut the tails in one of the side panels:
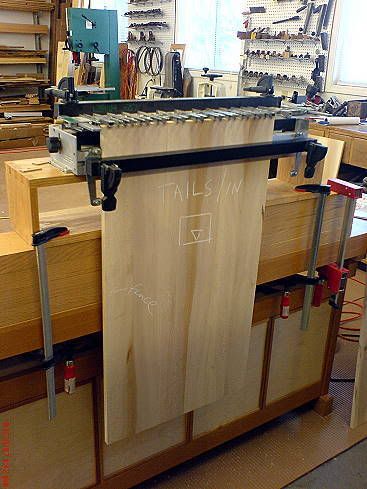
Cutting the pins on the bottom panel:
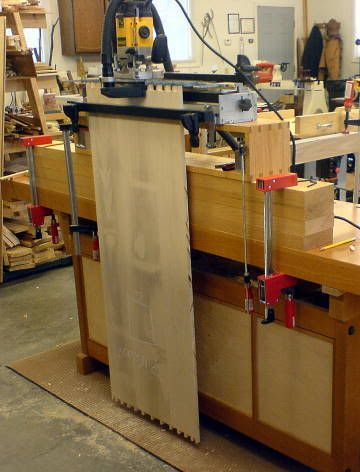
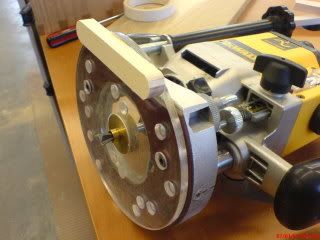
Getting ready to cut the sliding dovetail sockets: Note the spacer, to prevent the router from tipping even a few thousands of an inch - the wooden spacer thickness was the distance from the bottom of the router sub-base to the surface of the boards, less 0.006", to compensate for the double sticky back tape thickness:
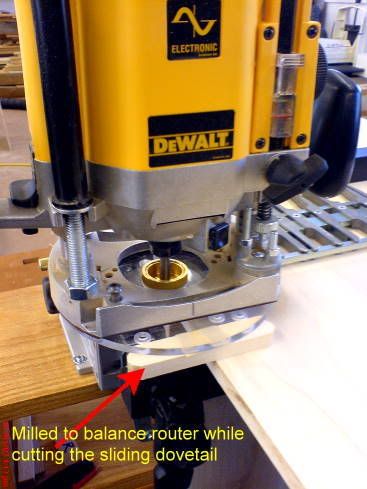
This is how I attached the wooden spacer to the bottom of the router sub-base with tape - the sub-base rides on the jig's fingers and the spacer rides on the panel:
The sliding dovetail finished, after sneaking up on the final thickness with a total of four passes:
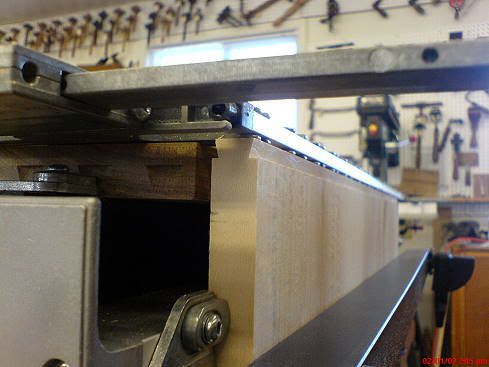
A shot of the finished sliding dovetail from the other end - the finger bar is moved back ever so lightly after each pass on every side of the dovetail, until the final thickness is reached:
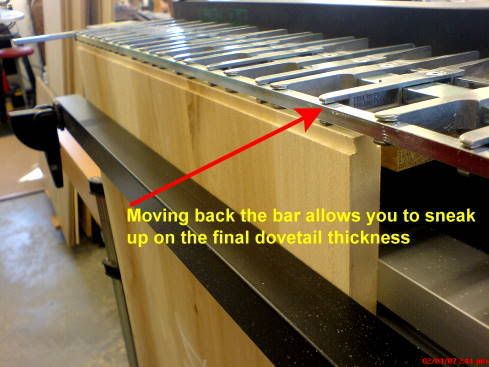
Dry fit of the sliding dovetail - a little cleanup will be needed on all surfaces to make things look nice:
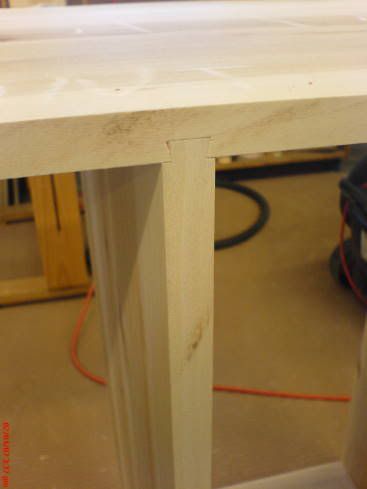
Dry fit of the vertical divider in the carcass - it worked just fine:
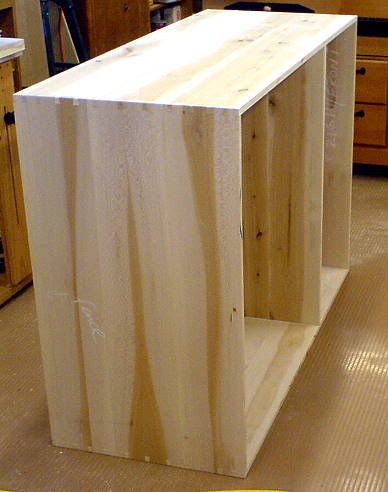
The dry fit from a different perspective:
Background:
Our daughter is expecting a new baby, our fifth grandchild. She wanted to buy a new changing table, as her old/cheap one is getting rickety and cannot really be reworked into anything decent. So, I step in and start making this, after LOML asked our daughter to not spend any money she does not have to spend

Project
Make a new changing table that can later be used as a chest-of-drawers with shelves on the side. Why waste the effort if the changing table would be used only a few months at best?

Design: Based on a Wood Magazine project plan -
1. It must be 42 inches tall, to near elbow height for our daughter.
2. Around 20 inches deep.
3. Around 50 inches long. The top will be attached to allow it to float on the top board, to allow for expansion.
4. Incorporate at least three, and possibly four drawers, around 30 inches wide, on full extensions slides mounted on the sides.
5. Have at least two adjustable shelves.
6. Light color wood, as daughter hates dark woods.
7. The finish should be easily redone, as it is known that some damage will take place. ==>> Waterlox.
8. Use solid wood all the way around. ==>> QS sycamore! Had to order some, to make the drawers - hope it will be here soon... In the meantime, using flat-sawn for the boxes, but the fronts will be QS.
9. Dovetail construction for the main box - tails showing on the side panels; sliding dovetail for the vertical divider.
10. Depending on how well things go, the final dimensions should be close to those given above


11. Not shown: Railing, using purchased turned spindles. Still must finalize the design. Will be removed after the baby outgrows the changing table.
Thanks for looking! I will have an update sometime in the near future.
--------------- Al
Carcase construction:
The following photos illustrate the steps I took to get the basic carcass done, with some explanation of the why I did things in a certain way:
Basic design: SketchUp design, using Sketchy Pen Sepia Style in Google SketchUp 6:

Panel glue-up:
Side panel:

Bottom Panel:

Both side panels trimmed to final size:

I had to raise and really secure the Leigh D4 dovetail jig to accommodate the longer panels:

Getting ready to cut the tails in one of the side panels:

Cutting the pins on the bottom panel:

Getting ready to cut the sliding dovetail sockets: Note the spacer, to prevent the router from tipping even a few thousands of an inch - the wooden spacer thickness was the distance from the bottom of the router sub-base to the surface of the boards, less 0.006", to compensate for the double sticky back tape thickness:

This is how I attached the wooden spacer to the bottom of the router sub-base with tape - the sub-base rides on the jig's fingers and the spacer rides on the panel:

The sliding dovetail finished, after sneaking up on the final thickness with a total of four passes:

A shot of the finished sliding dovetail from the other end - the finger bar is moved back ever so lightly after each pass on every side of the dovetail, until the final thickness is reached:

Dry fit of the sliding dovetail - a little cleanup will be needed on all surfaces to make things look nice:

Dry fit of the vertical divider in the carcass - it worked just fine:

The dry fit from a different perspective:


 myself later, as I'm usually a bit heavy handed and have to sand the marks out


