- Messages
- 37,078
- Location
- ABQ NM
During Memorial Day weekend, LOML and I spent the weekend at my friend (and bandmate) Jeff's cabin. While we were there, one recurring problem was that the handle kept falling off the fireplace poker. I told Jeff I had the technology to fix it, lol.
A couple of weekends ago Jeff was over working on another project (a pair of frames for his driveway gate) so we discussed a few ideas and I gathered some scrap sycamore and walnut and milled up the pieces. Then, over the course of the next week, I made a few cuts and glued up the blank. On Friday of last week, Jeff came over and watched me turn the blank into a handle. He also took a few photos of the process. (Part of his job at work is photographing stuff. In fact, he and I have both been into taking pictures ever since we took a photography class together in high school. We go way back as friends.)
Anyway, grab a cup of coffee, warm up your scrolling finger, and get ready for a barrage of pics explaining the process...
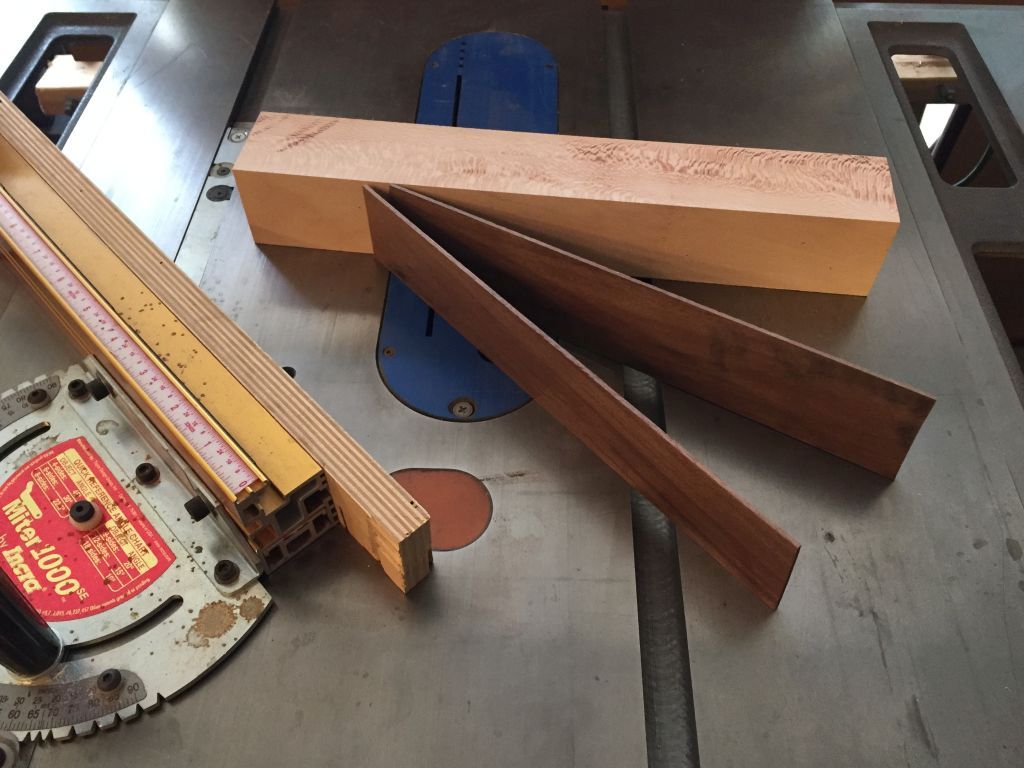
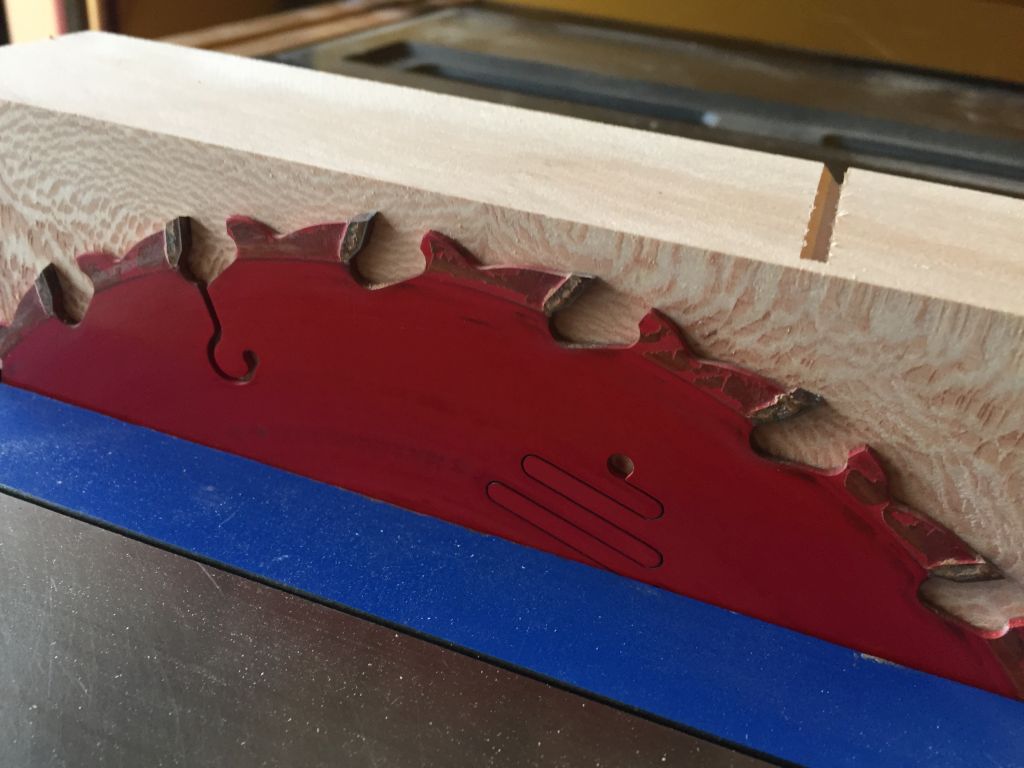
Here's the milled wood ready to start gluing up, The strips of walnut are 3/32" thick, the exact same thickness as the kerf on my tablesaw blade. The Incra fence setup on the tablesaw makes cutting thin and consistent strips like this easy. I zeroed the fence with the side of the stock on the blade, and then moved the fence toward the blade 3/16" (the thickness of the blade plus the desired thickness of the walnut). My 3/32" strip came off the offcut (left) side of the blade. Then I moved the fence another 3/16" toward the blade and made another cut. I ended up repeating the process a few times just to have some spare strips in case they were needed. And yes, those are blade burn marks on the sycamore. I was feeding it a bit too slow, but the marks won't matter since they're going to end up as chips on the floor of my shop.
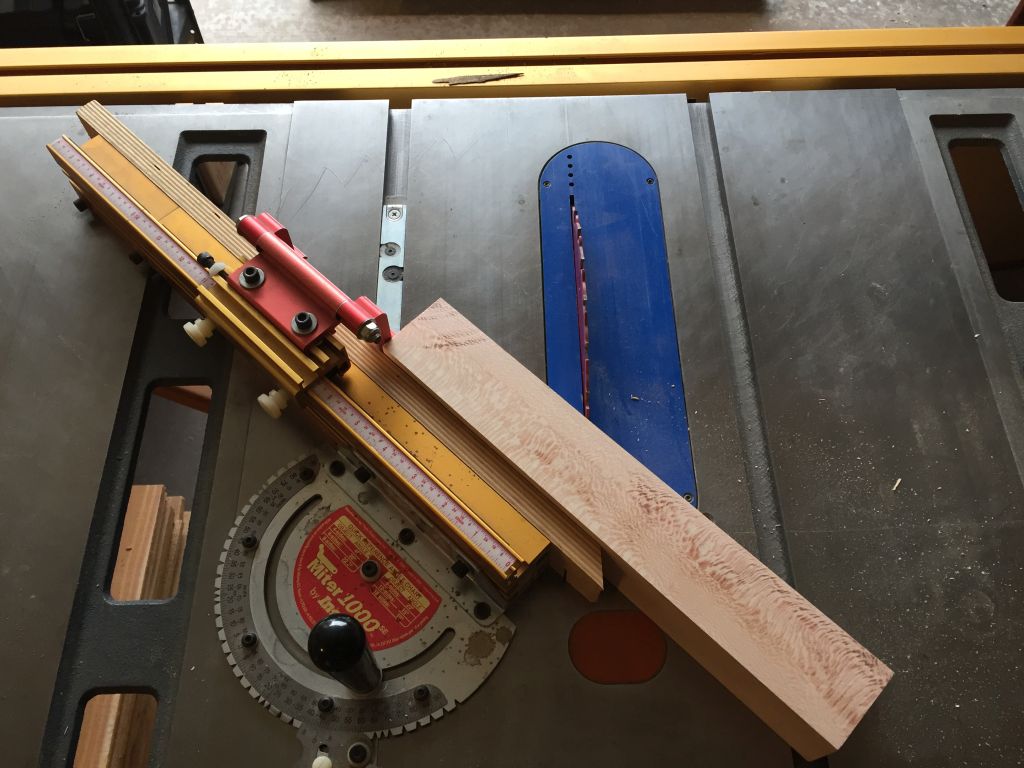
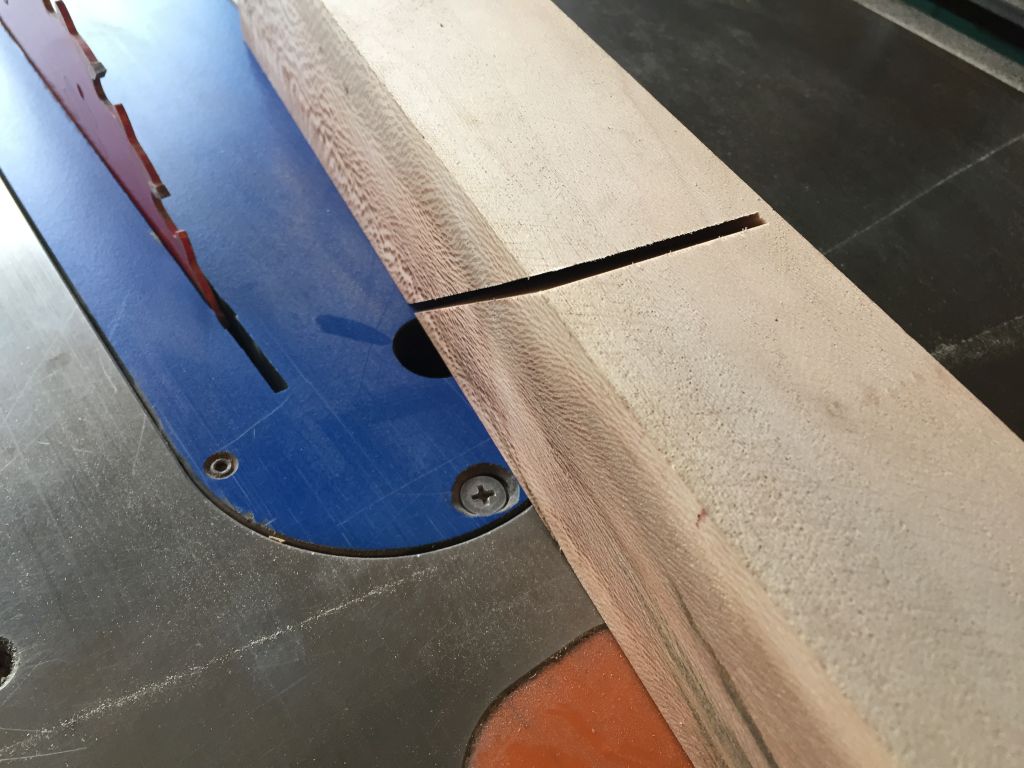
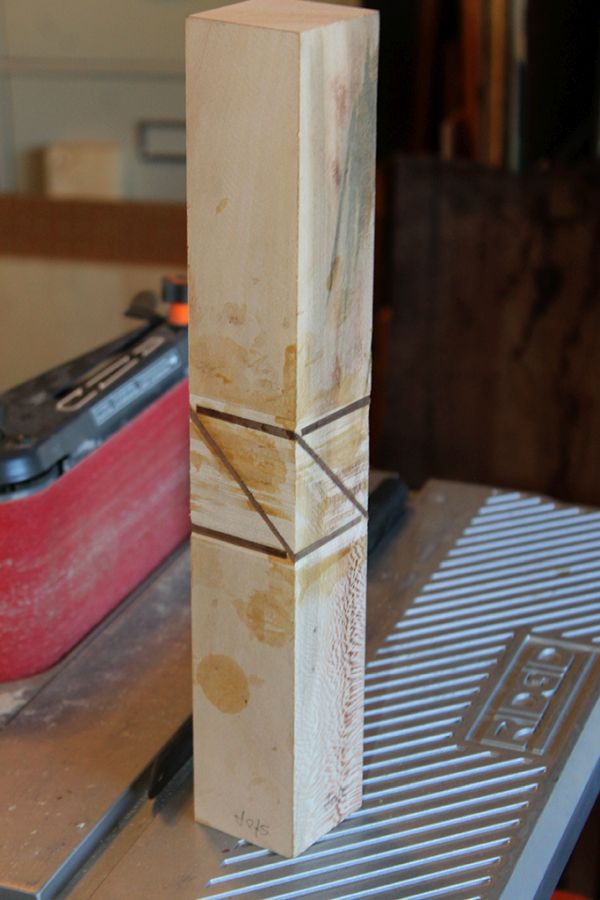
The next step was to make a 45º cut almost all the way through the blank. I set the stop on my miter gauge to a random location to make the cut in the approximate middle of the blank. The exact location wasn't critical. I will eventually cut four slots -- one on each side of the blank. I also left everything on the saw set up and locked in place until I made each of those four cuts over the course of the next few days.
This photo was taken after the first cut was made, just to show the depth of the cut. As you can see, it didn't go all the way through the blank. This was intentional.
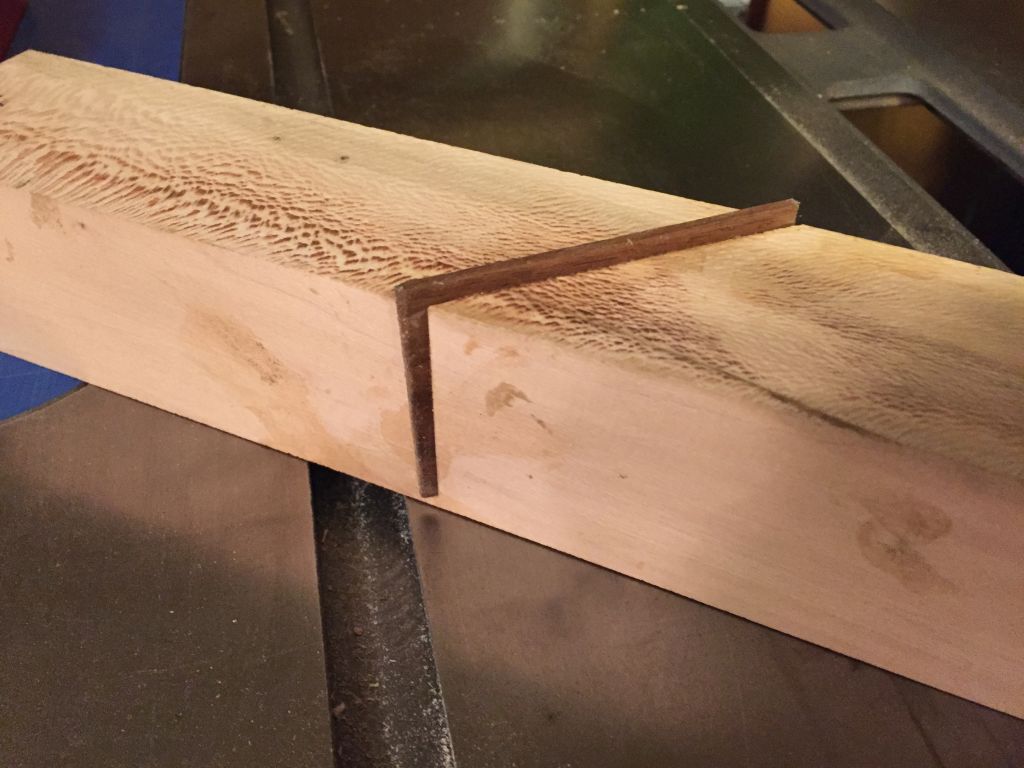
Here's another look at the first slot I cut in the blank.
Next, I glued a strip of walnut in the slot. This photo shows the dry test fit. The walnut was intentionally cut a bit oversized, since I planned to trim it later.
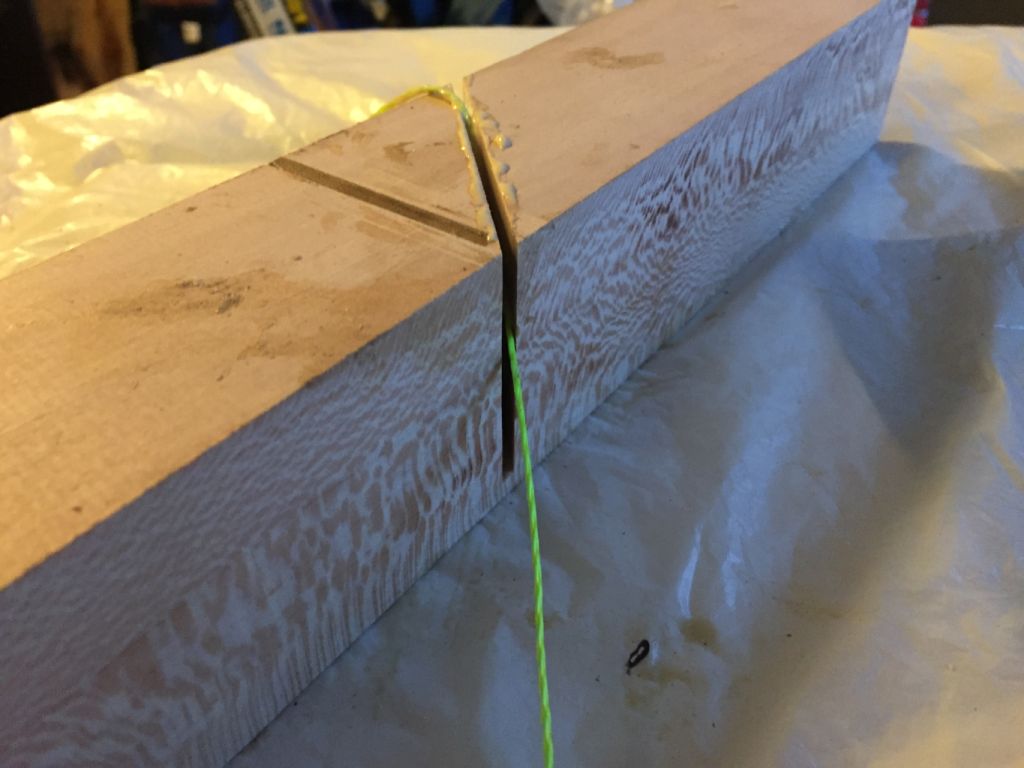
The next day, after the glue dried, I trimmed off the excess walnut flush with the blank and cut the second slot on the next side of the blank. This photo shows the piece of string I used to work the glue into the slot before inserting the next strip of walnut.
Here's the second strip in the clamp.

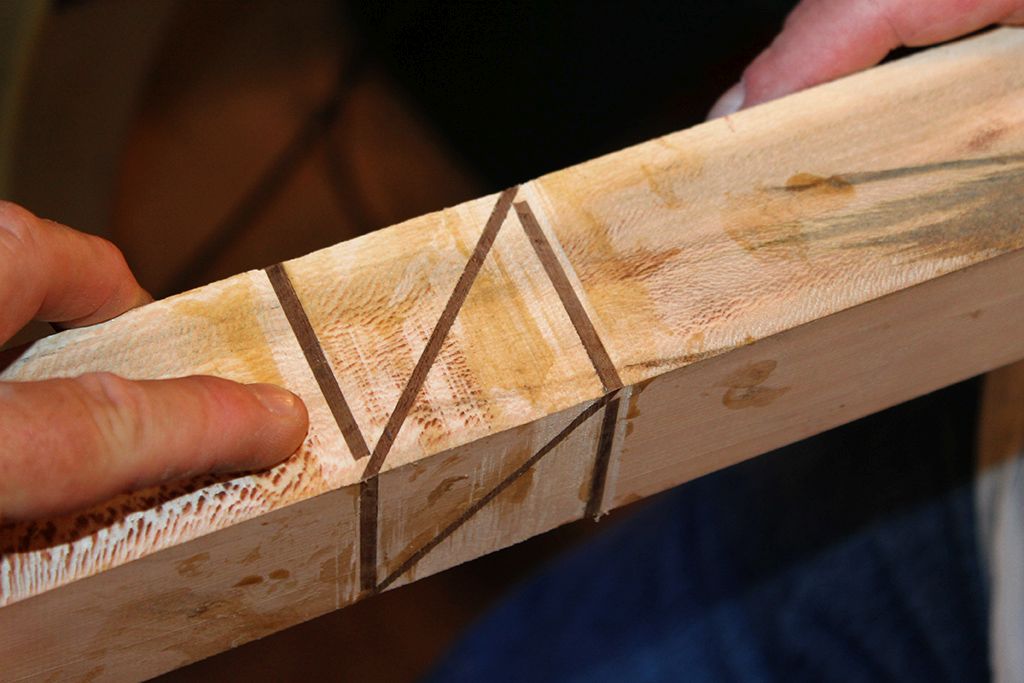
I repeated that process for the next couple of nights, until I had four strips of walnut glued at a 45º angle to the blank -- one strip on each of the four sides of the blank. Some of you will have figured out what I'm doing here. The rest of you will learn in a bit.
Here's another shot of the blank right before I put in on the lathe. You can see the marks on the blank where I trimmed the excess walnut with the band saw. It didn't need it to be neat, because all of that sloppiness will be turned away on the lathe.
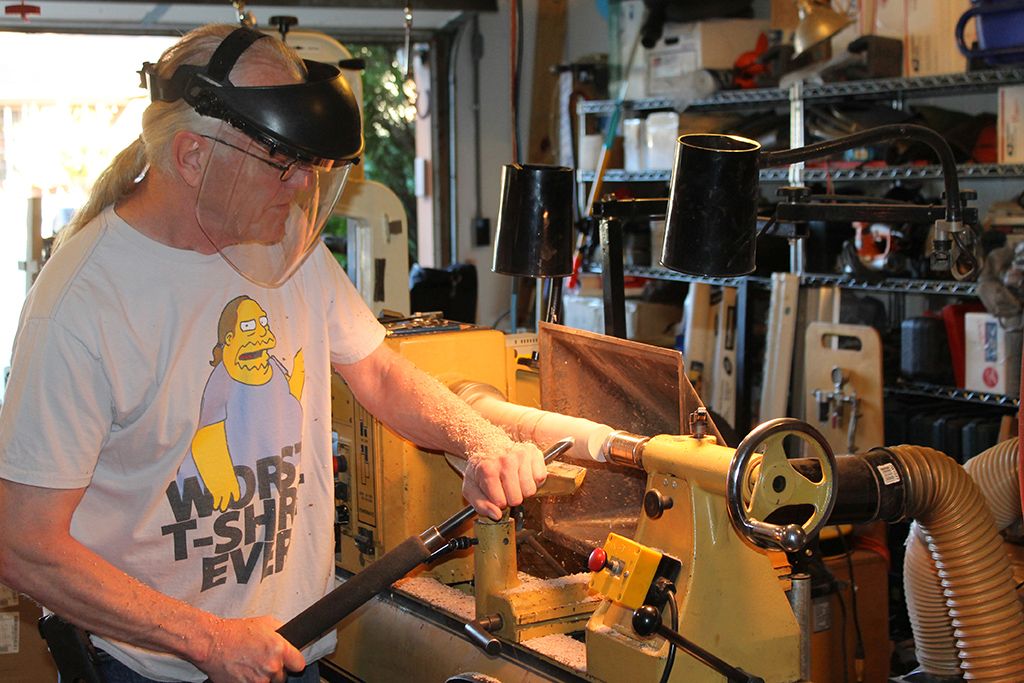
Here's an action shot Jeff took as I was getting the blank rounded off.
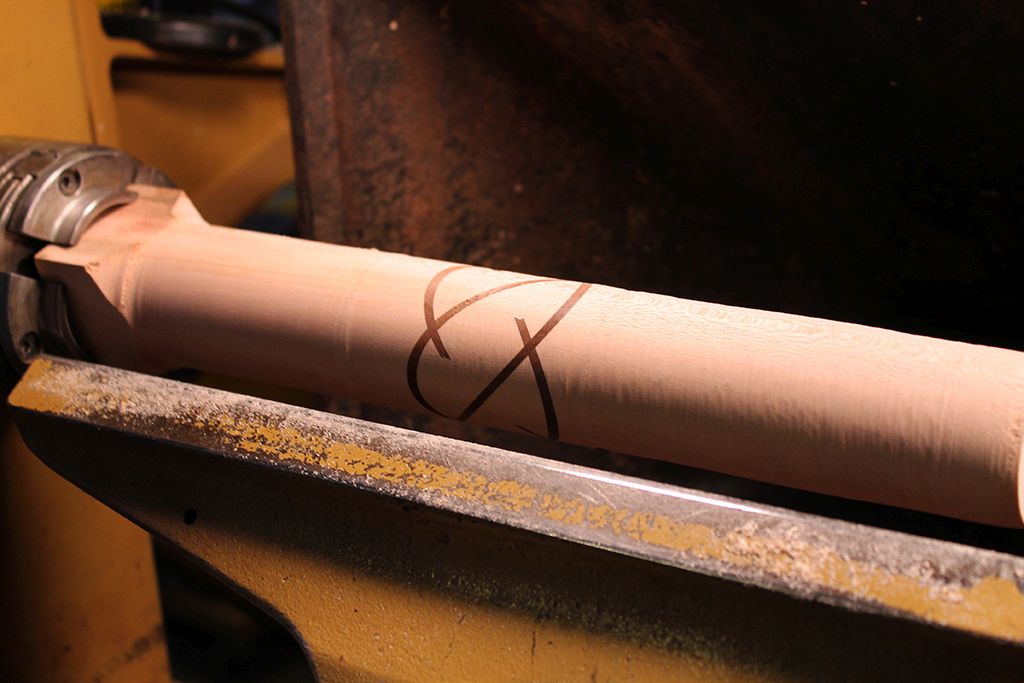
Another shot a few minutes later. The pattern is starting to develop, but there's still quite a bit of wood yet to be cut away.
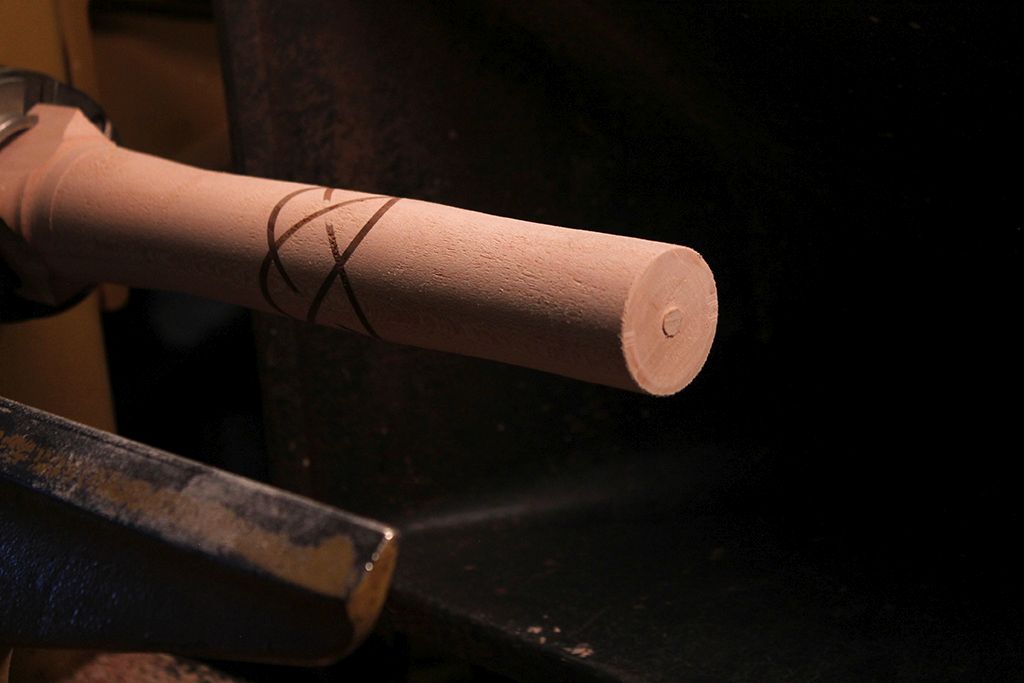
Once I had the blank rounded, it was time to trim the length and decide where the pattern should be in relation to the ends of the handle. Nothing was measured...I just eyeballed where I thought it would look OK. I parted off the excess wood and left a small nub to trim with a small pull saw.
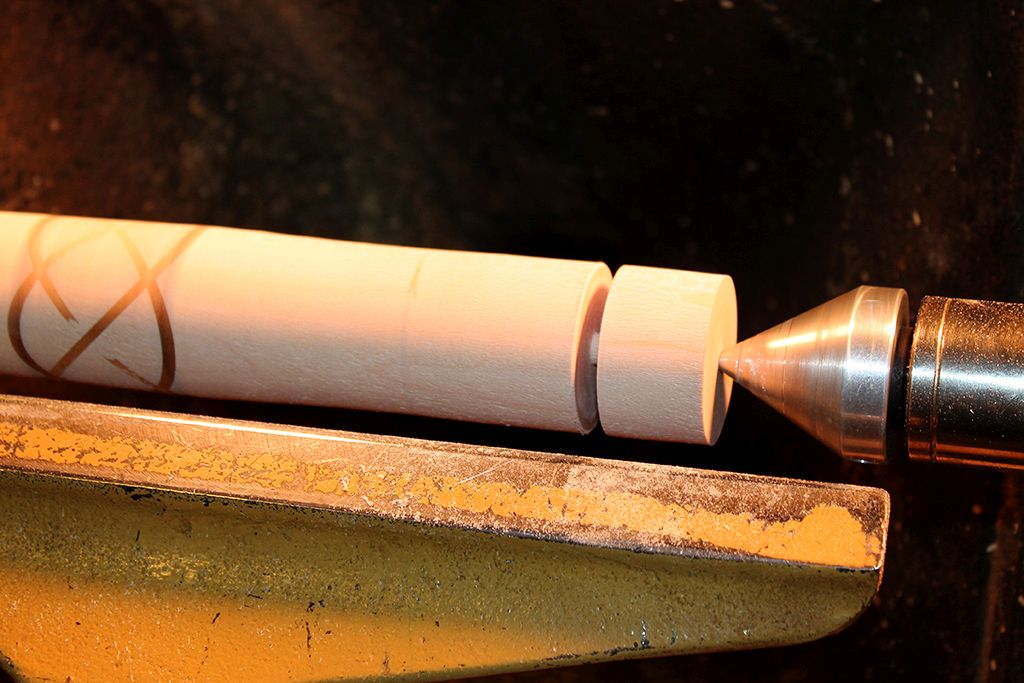
Excess has been cut off, and it's ready to use the drill chuck in the tailstock to drill a 3/8" diameter hole in the end of the handle for the poker shaft.
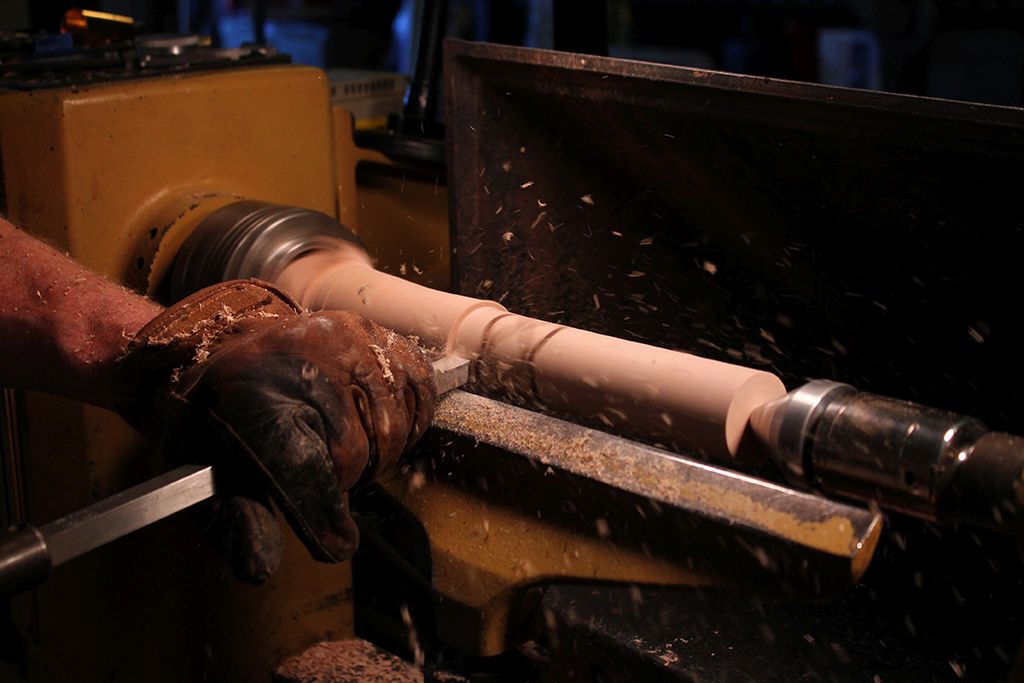
We failed to get any pics of the drilling process, but once the hole was drilled in the end of the blank, I stuck the point of the live center into it to continue turning the blank smaller. I wanted to hog off the wood quickly, so I used a (Easy Wood Tools) carbide scraper to speed things up a bit. The shavings were pretty warm, so I put on my turning glove. While I'm generally against wearing gloves around machinery, this is one case where I do make an exception. This glove has been wet so many times that the leather is stiff like a baseball glove. It would take pretty extraordinary circumstances to get it caught on a blank or spinning chuck. Nonetheless, I'm particularly careful when I wear it.
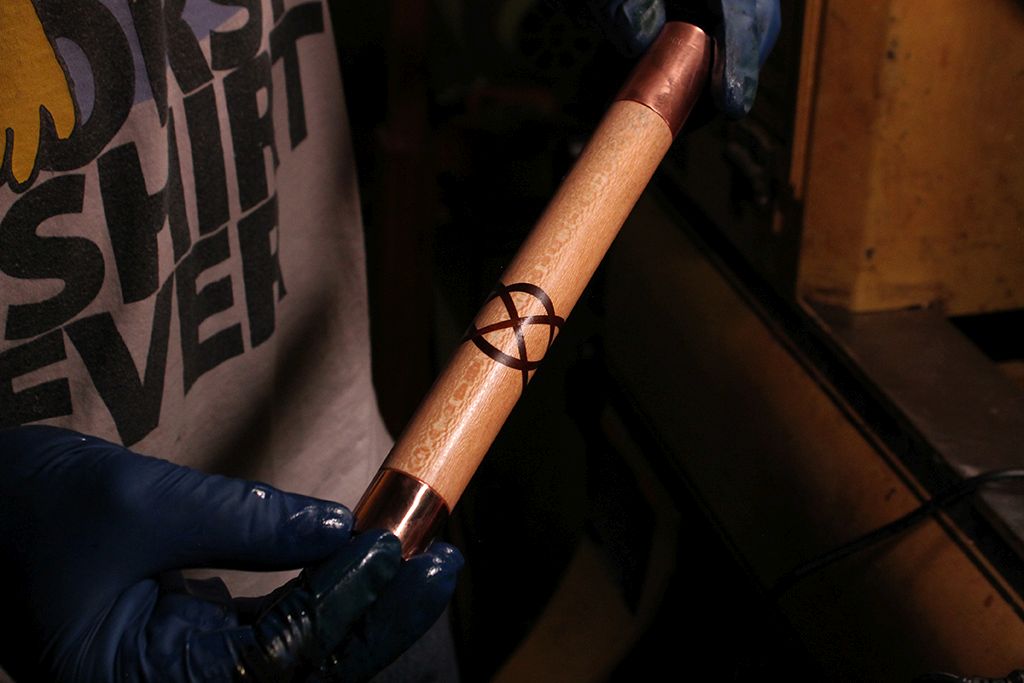
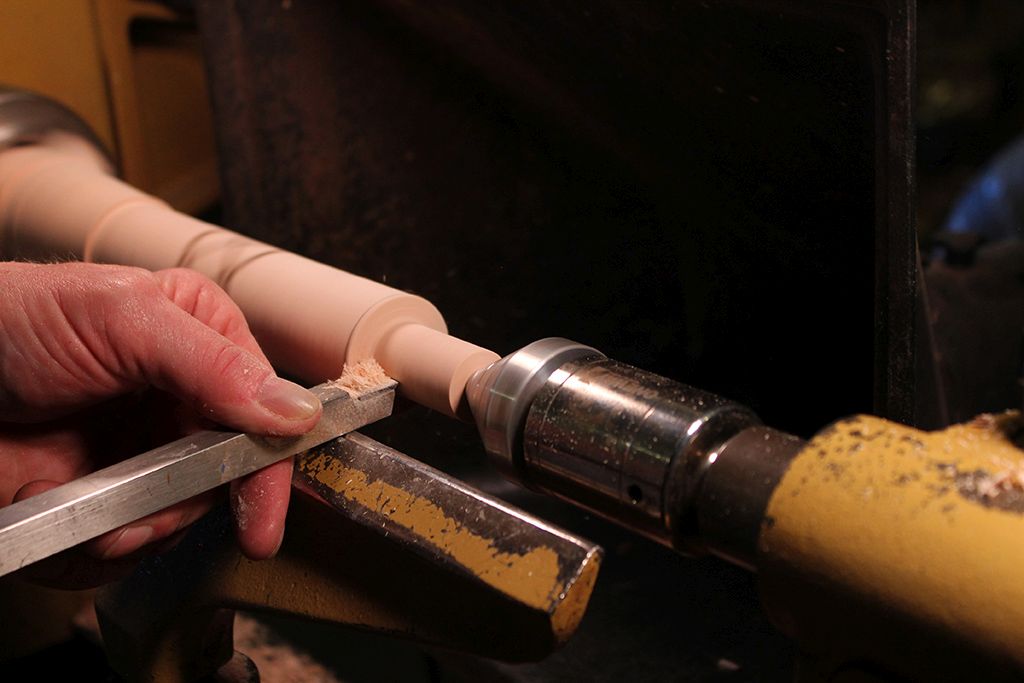
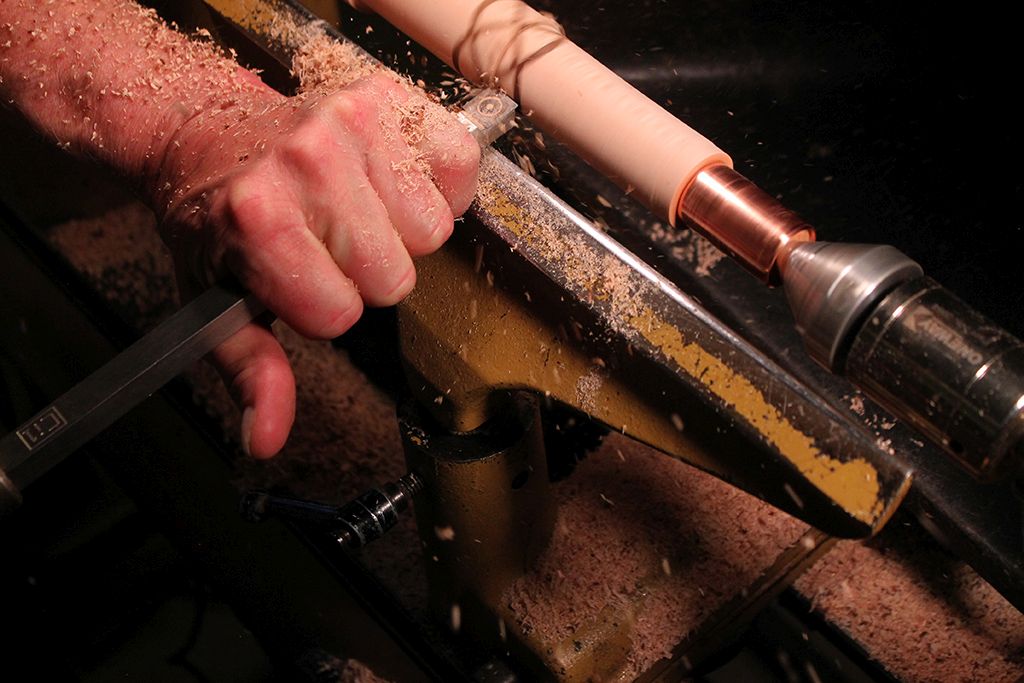
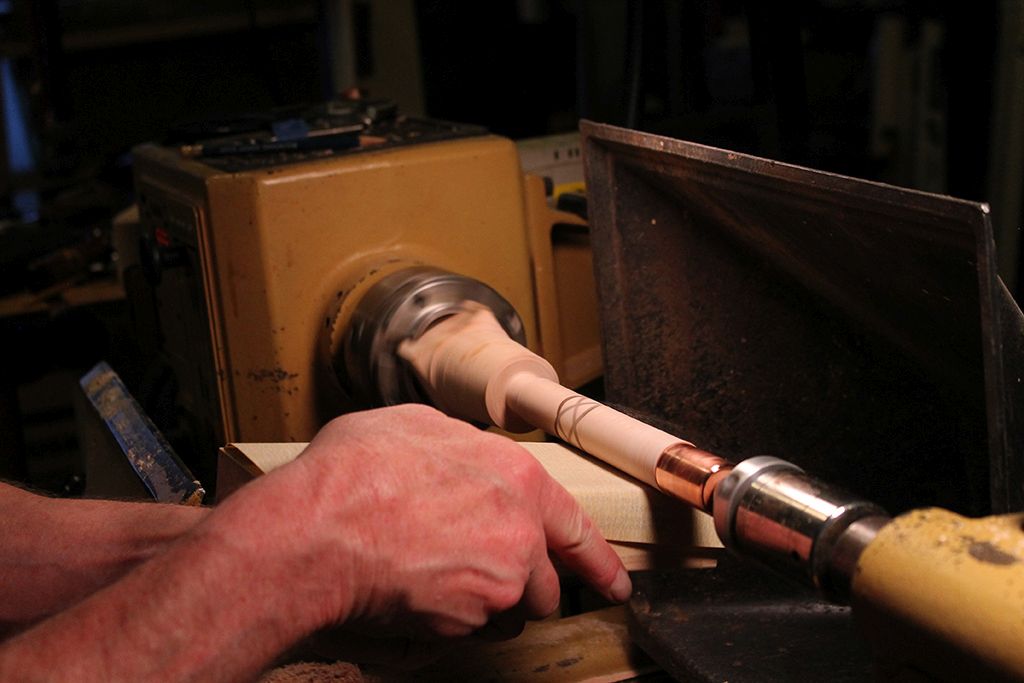
I planned to use a 1" copper pipe coupling for the ferrule at the poker end of the handle, so I turned a tenon on that end to accommodate the ferrule. I used machinist calipers to measure the ferrule as well as the tenon. I didn't actually look at the numbers...I was just using it as a gauge for the fit. I used the carbide scraper again for this cut just to help keep the diameter consistent and the shoulder of the cut square.
After I glued the ferrule onto the tenon, it was time to take off more wood on the handle part. I had already decided that the handle profile would be a straight cylinder with no coves, beads, or other fancy cuts. I wanted something simple to show off the inlaid pattern.
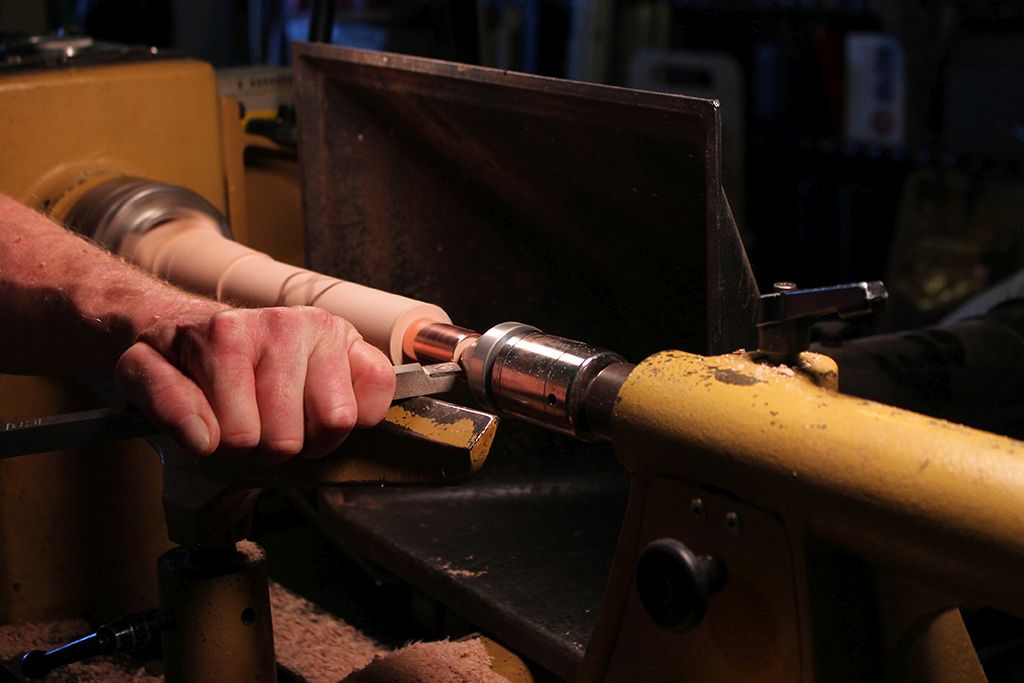
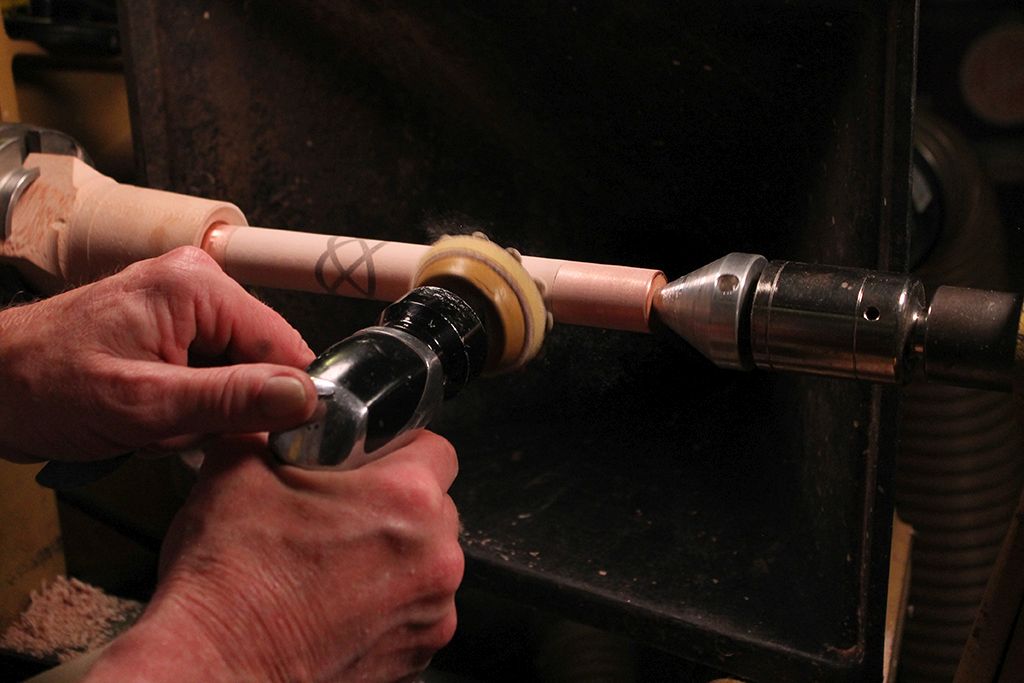
I left the tenon a bit shorter than the ferrule, with the intention that I'd trim down the copper once it was glued on. In this photo I'm trying to do that with the carbide cutter, but I didn't like the way the cut came out. In the end, I just used a machinist's file with the lathe spinning. It made short work of the 1/8" or so of excess copper. It also made it easy to round off the edge of the ferrule.
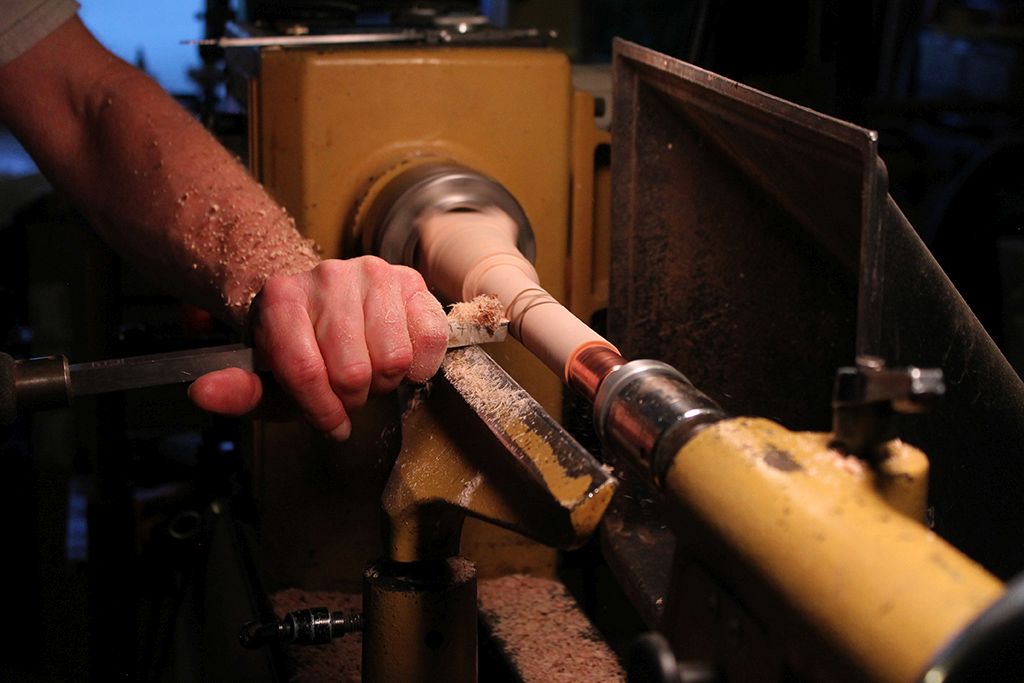
More diameter reduction of the handle.
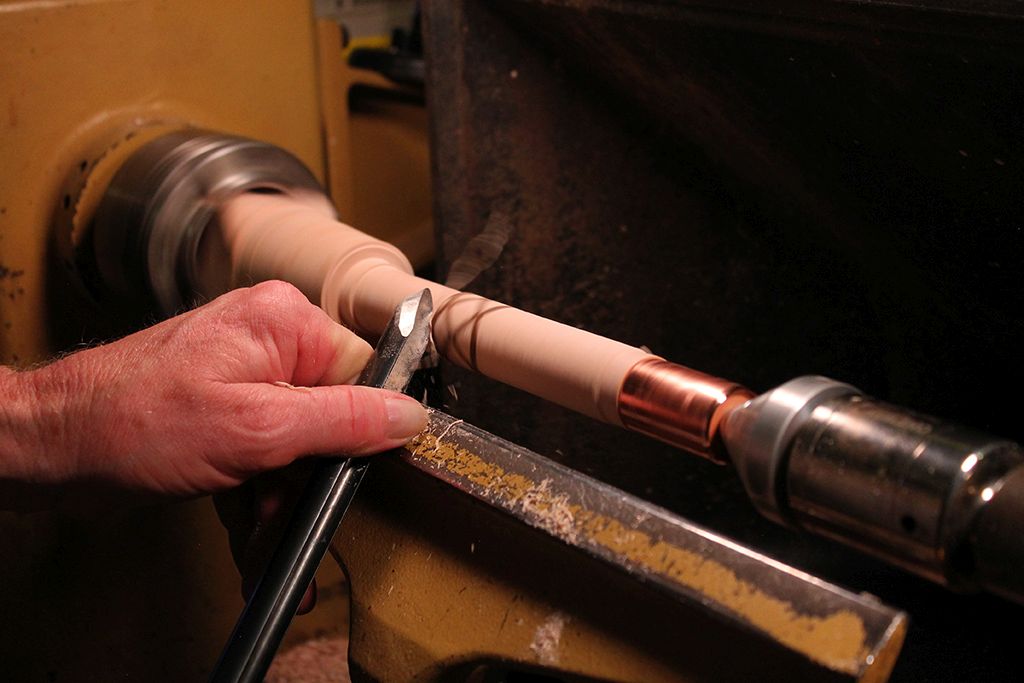
Once I started getting close to final diameter, I switched to a big bowl gouge and used a shearing cut to leave a smooth surface. A real spindle turner would have used a skew. I'm not a real spindle turner, lol. But I get around pretty good with a bowl gouge.
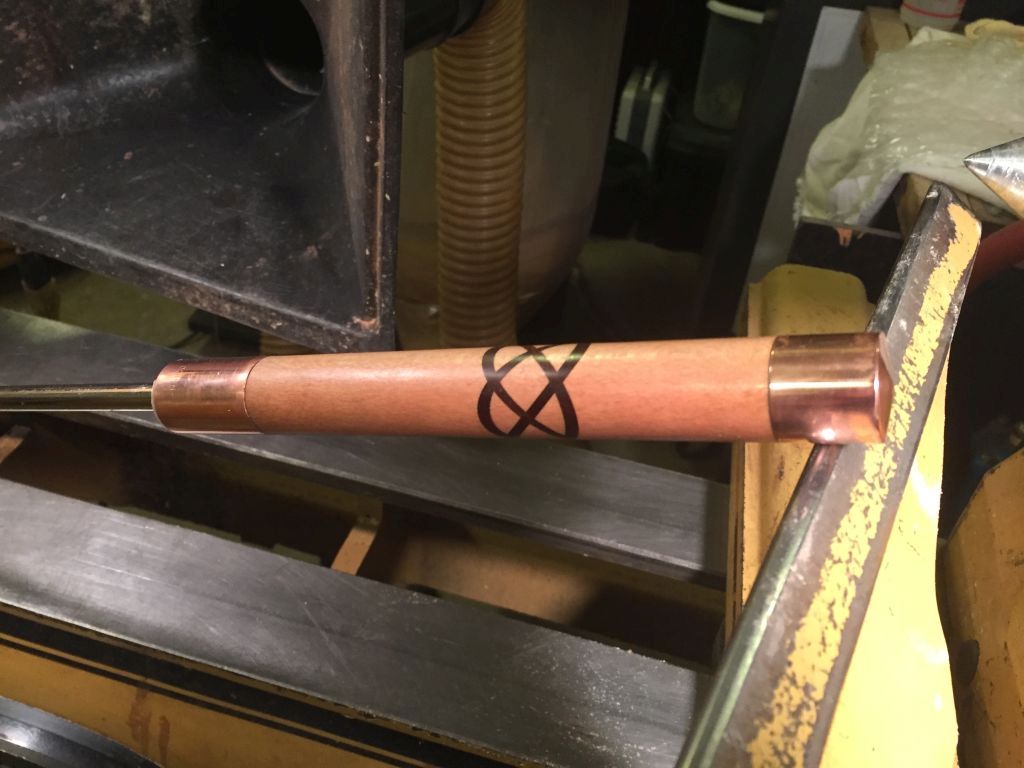
The bowl gouge left a nice surface, so I was able to start sanding at 220 grit. If you look closely, you can see at the chuck end of the handle that I've also cut a short tenon for the copper cap to fit over.
I let Jeff do a bit of the sanding just to get a feel for it, and I'm guessing after he set his camera down, he forgot to pick it back up. We didn't get any pics of me turning the shorter tenon on the other end of the handle to fit the 1" copper cap that I glued to the end of the handle. This next photo skips several steps and shows me doing the final sanding with my 2" ROS as I worked my way up to 400 grit. You can see part of the copper cap on the end of the handle, peeking out from the jam chuck I turned out of the leftover sycamore blank.
Here's another view of the jam chuck. Pretty simple, just a tapered hole that starts out slightly bigger than the copper cap. I started the hole with a Forstner bit, and then put a mild taper on it with a small detail gouge.

Continued in next post...
A couple of weekends ago Jeff was over working on another project (a pair of frames for his driveway gate) so we discussed a few ideas and I gathered some scrap sycamore and walnut and milled up the pieces. Then, over the course of the next week, I made a few cuts and glued up the blank. On Friday of last week, Jeff came over and watched me turn the blank into a handle. He also took a few photos of the process. (Part of his job at work is photographing stuff. In fact, he and I have both been into taking pictures ever since we took a photography class together in high school. We go way back as friends.)
Anyway, grab a cup of coffee, warm up your scrolling finger, and get ready for a barrage of pics explaining the process...
Here's the milled wood ready to start gluing up, The strips of walnut are 3/32" thick, the exact same thickness as the kerf on my tablesaw blade. The Incra fence setup on the tablesaw makes cutting thin and consistent strips like this easy. I zeroed the fence with the side of the stock on the blade, and then moved the fence toward the blade 3/16" (the thickness of the blade plus the desired thickness of the walnut). My 3/32" strip came off the offcut (left) side of the blade. Then I moved the fence another 3/16" toward the blade and made another cut. I ended up repeating the process a few times just to have some spare strips in case they were needed. And yes, those are blade burn marks on the sycamore. I was feeding it a bit too slow, but the marks won't matter since they're going to end up as chips on the floor of my shop.
The next step was to make a 45º cut almost all the way through the blank. I set the stop on my miter gauge to a random location to make the cut in the approximate middle of the blank. The exact location wasn't critical. I will eventually cut four slots -- one on each side of the blank. I also left everything on the saw set up and locked in place until I made each of those four cuts over the course of the next few days.
This photo was taken after the first cut was made, just to show the depth of the cut. As you can see, it didn't go all the way through the blank. This was intentional.
Here's another look at the first slot I cut in the blank.
Next, I glued a strip of walnut in the slot. This photo shows the dry test fit. The walnut was intentionally cut a bit oversized, since I planned to trim it later.
The next day, after the glue dried, I trimmed off the excess walnut flush with the blank and cut the second slot on the next side of the blank. This photo shows the piece of string I used to work the glue into the slot before inserting the next strip of walnut.
Here's the second strip in the clamp.
I repeated that process for the next couple of nights, until I had four strips of walnut glued at a 45º angle to the blank -- one strip on each of the four sides of the blank. Some of you will have figured out what I'm doing here. The rest of you will learn in a bit.
Here's another shot of the blank right before I put in on the lathe. You can see the marks on the blank where I trimmed the excess walnut with the band saw. It didn't need it to be neat, because all of that sloppiness will be turned away on the lathe.
Here's an action shot Jeff took as I was getting the blank rounded off.
Another shot a few minutes later. The pattern is starting to develop, but there's still quite a bit of wood yet to be cut away.
Once I had the blank rounded, it was time to trim the length and decide where the pattern should be in relation to the ends of the handle. Nothing was measured...I just eyeballed where I thought it would look OK. I parted off the excess wood and left a small nub to trim with a small pull saw.
Excess has been cut off, and it's ready to use the drill chuck in the tailstock to drill a 3/8" diameter hole in the end of the handle for the poker shaft.
We failed to get any pics of the drilling process, but once the hole was drilled in the end of the blank, I stuck the point of the live center into it to continue turning the blank smaller. I wanted to hog off the wood quickly, so I used a (Easy Wood Tools) carbide scraper to speed things up a bit. The shavings were pretty warm, so I put on my turning glove. While I'm generally against wearing gloves around machinery, this is one case where I do make an exception. This glove has been wet so many times that the leather is stiff like a baseball glove. It would take pretty extraordinary circumstances to get it caught on a blank or spinning chuck. Nonetheless, I'm particularly careful when I wear it.
I planned to use a 1" copper pipe coupling for the ferrule at the poker end of the handle, so I turned a tenon on that end to accommodate the ferrule. I used machinist calipers to measure the ferrule as well as the tenon. I didn't actually look at the numbers...I was just using it as a gauge for the fit. I used the carbide scraper again for this cut just to help keep the diameter consistent and the shoulder of the cut square.
After I glued the ferrule onto the tenon, it was time to take off more wood on the handle part. I had already decided that the handle profile would be a straight cylinder with no coves, beads, or other fancy cuts. I wanted something simple to show off the inlaid pattern.
I left the tenon a bit shorter than the ferrule, with the intention that I'd trim down the copper once it was glued on. In this photo I'm trying to do that with the carbide cutter, but I didn't like the way the cut came out. In the end, I just used a machinist's file with the lathe spinning. It made short work of the 1/8" or so of excess copper. It also made it easy to round off the edge of the ferrule.
More diameter reduction of the handle.
Once I started getting close to final diameter, I switched to a big bowl gouge and used a shearing cut to leave a smooth surface. A real spindle turner would have used a skew. I'm not a real spindle turner, lol. But I get around pretty good with a bowl gouge.
The bowl gouge left a nice surface, so I was able to start sanding at 220 grit. If you look closely, you can see at the chuck end of the handle that I've also cut a short tenon for the copper cap to fit over.
I let Jeff do a bit of the sanding just to get a feel for it, and I'm guessing after he set his camera down, he forgot to pick it back up. We didn't get any pics of me turning the shorter tenon on the other end of the handle to fit the 1" copper cap that I glued to the end of the handle. This next photo skips several steps and shows me doing the final sanding with my 2" ROS as I worked my way up to 400 grit. You can see part of the copper cap on the end of the handle, peeking out from the jam chuck I turned out of the leftover sycamore blank.
Here's another view of the jam chuck. Pretty simple, just a tapered hole that starts out slightly bigger than the copper cap. I started the hole with a Forstner bit, and then put a mild taper on it with a small detail gouge.
Continued in next post...