Timberline saw project

Carol Reed

In Memoriam
Messages
5,533
Location
Coolidge, AZ
This is one of the saws that followed me home a few weeks ago. I was looking for something to renovate for the book to show what could be done to a 'lesser' saw so that it would function much like a top of the line cabinet saw. No, I am not trying to make a silk purse out of a sow's ear, as my grandma used to say. But the reasons and process will be detailed in the book. Here I will share the process of getting it ready to use initially.

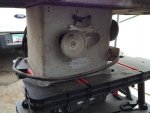
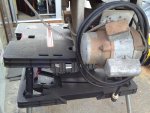
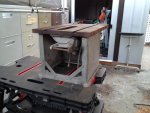
The Timberline was manufactured in the late '40's and early '50's. Lots of cast iron. Massive motor. They were marketed as 8" and 10" saws. Mine had a 7 1/4" blade on it. Not sure a 10" would fit, but that is a subject for another day. Here is what I am starting with:
TL front 1.jpg

TL back 2.jpg

TL cabinet front.jpg

It sat on my new pop-up table for a couple of weeks. Did I mention it is/was heavy?
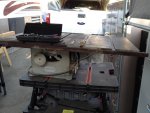
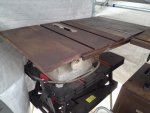
TL table bend 1.jpg

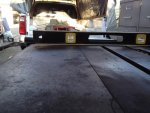
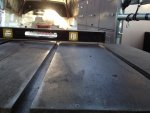
That doesn't look good.

TL table bend 2.jpg

That REALLY doesn't look good. Hope the table recovers. Time to start stripping stuff off of it to lighten the load.

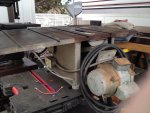
And speaking of bending, is that what I think it is?
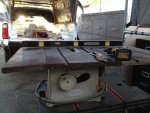
TL droopy extensions 1.jpg

A closer look or two.

TL droopy extensions.jpg TL droopy extension 2.jpg

Looks like this support didn't help much.
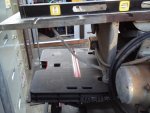
TL extension support.jpg

To be continued...
 
Continued....

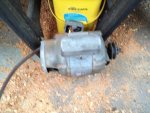
The heaviest culprit was the motor. Look at this! #10 wire! At least 30-35 #'s. Pushing my back here. But it is safely on the ground.

TL motor off.jpg

And I am left with this:

TL almost stripped.jpg

I went on to remove the top but the light was failing and I got stuck at one of the handles. Need some penetrating oil. Will get some tomorrow.

Discovered some things. The belt, dried out and now trashed likely was way under sized. I need to find how to find the right belt. I know there is an optimum sides that occupies the pulleys properly. Any suggestions on where to look?

The top had on regular cast iron extension to the left and an aluminum top with twin dados on the right. I certainly can reinstall them so they stay flt with the main table, but I am not sure I want to yet. This saw will live in a rolling cabinet, so those extensions are unnecessary. We will see how that plays out in the future.

Interesting thing with that heavy electrical cord. It went through a 15 amp household light switch. Here is the replacement switch I got to replace it.

Switch.jpg

I did do a paperwork search before I began. I found very little information. Only two on OWWM. No manual. Too old for eReplacement, I guess, so no nice exploded drawings with original part numbers. I am taking lots of pictures and keeping hardware with the pieces from when it came, but there is a lot that is no longer original. This puppy may have been rode hard and put way wet a time or three but the motor alone is worth more than I paid for the whole saw. Its a keeper, and a user. It has a rack and pinion drive fence, but I will set that aside in exchange for a shop-made T-square type fence.

Lots of iron, so I will get to do the electrolysis thing, but also lots of oxidized and corroded aluminum. Don't know what to do about that yet. Suggestions welcome.
 
That is a beast of an old saw!

maybe you can find someone who can media blast the whole thing for you, might save you a lot of time on the restoration?
 
Carol,
Nice project. Is that iron extension flat? It looks maybe a bit warped in the pics???
I know Darra James used to use cast aluminum extensions also. My first table saw (an old Craftsman) had a aluminum top. It was fine, but i had t make sure it was well waxed if i was running nearly completed parts/pieces through it. As you run wood across the aluminum surface, it would leave black rub marks on the face of the wood. It sands off just fine, but still. Regular applications of Johnson's Paste Wax took care of it.
About the belt size, I learned a lot about belt cross section / sizing from the McMaster Carr website. Look for belts in the "power transmission" section of their site and you'll find a lot of useful information on the various types.
Looking forward to seeing your progress. Watching someone else's project is the next best thing (sometimes better) than doing my own.
paulh
 
Wow, 4 different threads here on the same saw. I'll try to respond to all of them here. The shaft and the key. I sent the entire assembly to a machinist friend. When it comes back, it will have new bearings, a pristine shaft, and a new woodruff key in the pristine slot. It will be done right and I will be a happy camper. The price is right. A friend helping a friend. I pay for parts. Doesn't get any better than that.

I will check the table for flatness after I get it cleaned up. Thanks for the heads up. It and its extensions are cast iron.

Thanks also for the vinegar and new bolt tip for the electrolysis process. Really good idea.
 
Top