
glenn bradley
Member
- Messages
- 11,571
- Location
- SoCal
Like many of you I do not have the room for a large dedicated assembly table. My main solution for this is my knockdown assembly table which will handle items up to about the size of large dresser or a small wardrobe. My current project is larger.
I used to assemble these larger items at a height of zero (on the floor) or at a height of about 3 feet (on other work surfaces). This is doable but, sometimes awkward and neither I nor my back like moving these things as they gain weight while sub-assemblies move toward completion.
I have seen smaller torsion boxes and I-beams used in various configurations. These 60” versions are close cousins to a version in American Woodworker #148. The size is a good fit in my shop. I hope they will allow safe support of larger items while not hogging the entire open work area while I cobble parts together into a finished piece.
I use the same work area to assemble things that I do to breakdown sheetgoods. A quick SketchUp drawing makes sure I will get all the pieces broken out in one go. I don’t want to forget something and have to move things out of the way again to breakdown more material.

***> NOTE; dimensions of filler block is incorrect in the above pic. <***
I use the foam insulation to elevate the material and cut it with a circ saw of a jig saw. For MDF I prefer the jigsaw since it is nearly as quick as the circ saw and creates a lot less spoil.
.jpg") .
. .jpg") .
. .jpg")
I mark the service tempered hardboard with the same white pencils I use to mark other dark woods. It is surprising how little sawdust is left behind by Bosch’s very basic little dust fittings for the 1591 saw.
.jpg") .
. .jpg")
I can now easily maneuver the smaller pieces of sheet material and rip parts to width at the tablesaw. To make things more comfortable to move around I add an 1/8” roundover to the top and bottom skins, all edges.
.jpg") .
. .jpg")
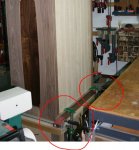
I add grooves for the service tempered hardboard to glue into. I use featherbords to assure things stay controlled and as accurate as possible.
.jpg") .
. .jpg")
To be continued . . . .
I used to assemble these larger items at a height of zero (on the floor) or at a height of about 3 feet (on other work surfaces). This is doable but, sometimes awkward and neither I nor my back like moving these things as they gain weight while sub-assemblies move toward completion.
I have seen smaller torsion boxes and I-beams used in various configurations. These 60” versions are close cousins to a version in American Woodworker #148. The size is a good fit in my shop. I hope they will allow safe support of larger items while not hogging the entire open work area while I cobble parts together into a finished piece.
I use the same work area to assemble things that I do to breakdown sheetgoods. A quick SketchUp drawing makes sure I will get all the pieces broken out in one go. I don’t want to forget something and have to move things out of the way again to breakdown more material.
***> NOTE; dimensions of filler block is incorrect in the above pic. <***
I use the foam insulation to elevate the material and cut it with a circ saw of a jig saw. For MDF I prefer the jigsaw since it is nearly as quick as the circ saw and creates a lot less spoil.
. . I mark the service tempered hardboard with the same white pencils I use to mark other dark woods. It is surprising how little sawdust is left behind by Bosch’s very basic little dust fittings for the 1591 saw.
. I can now easily maneuver the smaller pieces of sheet material and rip parts to width at the tablesaw. To make things more comfortable to move around I add an 1/8” roundover to the top and bottom skins, all edges.
. I add grooves for the service tempered hardboard to glue into. I use featherbords to assure things stay controlled and as accurate as possible.
. To be continued . . . .
Last edited:
.jpg")
.jpg")
.jpg")


 Doh! Was I so eager to share that I started the thread in the wrong place!?! Dork!

.jpg")
.jpg")
.jpg")
.jpg")
.jpg")