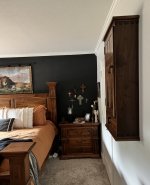
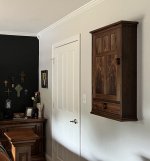
Wall Cabinet for Jewelry

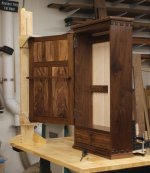
So close . . . Didn't quite get to the door hanging today. Should finish up tomorrow.

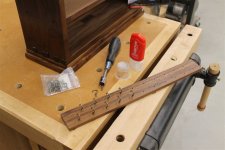
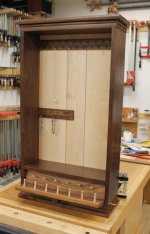
Helpful hint if you have a lot of hooks to put in. Find a socket that slips over the hook. Experience has taught me to add a dab of cement, super glue, or clear nail polish to the threads of the hooks. This helps resist any twisting or misalignment over time as things are placed onto and taken off of the hooks. I squirt a little puddle on top of a small cup and just dip the pointy end in before installing each hook.
Stacy Wall Cabinet (71).jpg
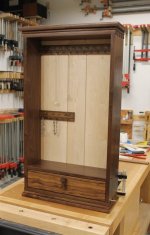
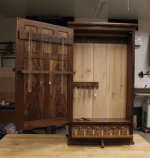
The necklace and bracelet hangers that mount to the rear of the cabinet are in. Again, experience has taught me to leave some clear area for the bottom shelf. Ring boxes, paperwork, and jewelry paraphernalia end up there.
Stacy Wall Cabinet (72).jpg
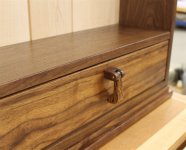
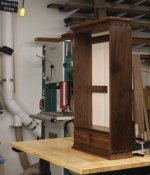
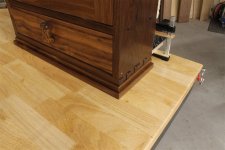
The tilt-out pull is on; walnut and bocote with a brass pivot rod.
Stacy Wall Cabinet (73).jpg

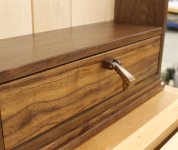
Stacy Wall Cabinet (74).jpg
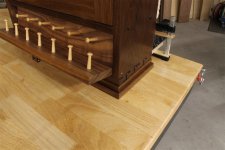
The ring tilt-out looks like this when open.
Stacy Wall Cabinet (75).jpg
Gravity pretty much holds the tilt-out closed but I added a hidden felt-padded magnet catch anyway. It "feels" better when it gives a little oomph as it opens.
 
Last edited:
Love your projects, the LOML really would like a Jewelry box, and I think I need to follow a similar design and make her one for Christmas, great idea!!!
 
Thanks all. Now I get to find out if everything goes back together the way I expect.
Stacy Wall Cabinet (78).jpg
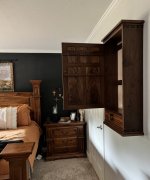
Here's how the door helper works. I was pleasantly surprised that this thing really does help.
Stacy Wall Cabinet (79).jpg
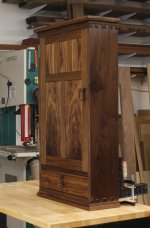
Door closed. I have a small magnet catch in the upper right hand corner. I was prepared to use one in the lower right as well but the one magnet seems to do the trick. I will put in a stop in the lower right so the door is supported when closed.
Stacy Wall Cabinet (80).jpg
Borrowed some items to show how the thing is supposed to work. Neither of us have enough rings to populate the ring pegs in the tilt-out but you get the idea.
Stacy Wall Cabinet (81).jpg
Detail shots.
Stacy Wall Cabinet (76).jpg

Stacy Wall Cabinet (77).jpg
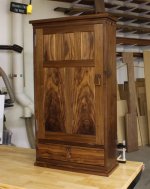
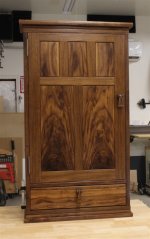
So, primarily walnut and maple. Ebony plugs on the sides, brass rods for the tilt-out and pull pivots, brass screws for the pulls, and antique brass for the hanger hardware and hinges. The pulls are walnut saddles with bocote pendants.
Overall shots.
Stacy Wall Cabinet (75).jpg

Stacy Wall Cabinet (82).jpg
It is always nice to bring a project to a close. I am laready pondering what is next. I stay busy in self defense; I hate yard work.
 
Last edited:
As always, most impressive. I don't think you realize how much joy you bring to us, allowing us to build vicariously though your meticulous postings. Gracias.
 
As always, most impressive. I don't think you realize how much joy you bring to us, allowing us to build vicariously though your meticulous postings. Gracias.
Thanks everybody. A thorough journal cuts both ways. On one hand it's great for sharing how you do things so that folks can see how we all work a bit differently. On the other hand when the project is finally complete it can be a little anti-climactic :D
 
What ... no lessons on how to build a proper shipping container?
Using the miracle of modern technology I took a remote crash course in the Rennie Heuer, School of Crate Design. This crate is my doctoral dissertation deliverable. If the cabinet inside makes it to Texas unscathed I can apply for a Piled Higher and Deeper degree.
 
Last edited:
What ... no lessons on how to build a proper shipping container?
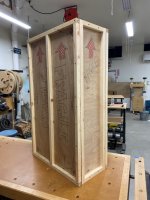
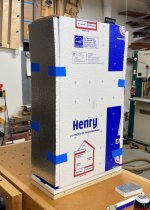
This is straight out of what I learned from Rennie via text and shared pics. My interpretation may not be exactly what Rennie does but if its close I imagine its OK. I used a couple of "dog towels" (towels that have been washed so many times that they don't have any lint left to offer) to wrap the piece. I used 1" rigid foam to protect and isolate the piece.

Stacy Wall Cabinet (83).jpg

I used spray adhesive to attach the foam to some 1/4" plywood panels and just blue-taped other pieces of foam in place. The 1" x 1" pine frame pieces are glued and air-stapled to the plywood parts. These assembled panels are then glued and screwed together except for one panel that is screwed only. This not-glued panel is labeled "open here".

The crate is sized so that the piece is held pretty tightly. Material for the crate was about $50. The piece weighs an even 30 pounds and the crate is 28 pounds. I don't scrimp on the glue or screws as we all know how careful some material handlers are between points A and Z.
 
This is straight out of what I learned from Rennie via text and shared pics. My interpretation may not be exactly what Rennie does but if its close I imagine its OK. I used a couple of "dog towels" (towels that have been washed so many times that they don't have any lint left to offer) to wrap the piece. I used 1" rigid foam to protect and isolate the piece.

View attachment 127014

I used spray adhesive to attach the foam to some 1/4" plywood panels and just blue-taped other pieces of foam in place. The 1" x 1" pine frame pieces are glued and air-stapled to the plywood parts. These assembled panels are then glued and screwed together except for one panel that is screwed only. This not-glued panel is labeled "open here".

The crate is sized so that the piece is held pretty tightly. Material for the crate was about $50. The piece weighs an even 30 pounds and the crate is 28 pounds. I don't scrimp on the glue or screws as we all know how careful some material handlers are between points A and Z.
Better than I could have done by myself. Bravo!
 
Top