Maple Craftsman Dining Table Build

Brent Dowell

Administrator
Staff member
Messages
16,784
Location
Reno NV
Well, Got the wood on Friday. Got it stacked on Saturday. Guess it's time to get started on the table.

So today is basically wood selection and 'think about it' day. :rolleyes:

Before I cut one piece of wood, I want to spend some time just looking at the pieces, thinking about what I want to do, and how I'm going to do it before I start. This will be my biggest project, and first real household project, so I want to make sure I do things right the first time.

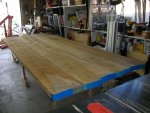
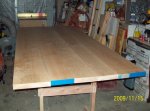
The size of the table I'm thinking about will be 7' long by 42" wide. So I had two nice wider boards, and quite a few thinner boards. What I've got laid out here is 10' long by ~45" wide. That gives me a few extra inches of width, and I'm not really going to cry if the table ends up 41" wide. I figure I'll cut the boards about 6" longer than 7' to give me a little length to play with.

The boards are slighty cupped, and one has a bit of a bow, that bow is at the end and most of that will be cut off.

I'm working off of an article in Fine Wood Working called 'Stickley Done Lightly'. It was a 48" wide 10' long table. They used curly maple, but I'm just using regular Eastern Rock Maple. I'm also going to do mine a bit smaller than theirs, but in the general style.

So, Not sure how long this project will take. We've had some awfully nice days lately out in the shop. 57 degrees out today, but things will be getting cold soon, and I'm sure I'll be slowing down then, plus I have other projects in the housel.

I'd really like to get the table done before Thanksgiving, that gives me what (Larry, you told me earlier today!) 18 days? If I can at least get the table top glued up by then, I guess I might just have to use my new sawhorses for the legs until I finish it!

I do plan on making chairs and a bench for it as well, but that will probably be a completely different story! :thumb:

Wish me luck!

Here's a picture of the boards layed out to decide how best to arrange them before I cut.

attachment.php


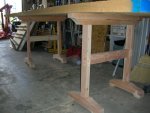
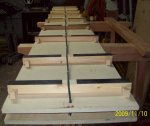
And I think this shows why I wanted some stout sawhorses!

attachment.php
 

Attachments

  • diningtable_01.jpg
    diningtable_01.jpg
    127.1 KB · Views: 540
  • diningtable_02.jpg
    diningtable_02.jpg
    110.5 KB · Views: 541
I know that your project with that wood will be fun and the final outcome will be beautiful ----- But I will say it again -- I really like your saw horses...

Too nice to be saw horses!! got me wanting to make some..

Paul
 
I know that your project with that wood will be fun and the final outcome will be beautiful ----- But I will say it again -- I really like your saw horses...

Too nice to be saw horses!! got me wanting to make some..

Paul

The saw horses were really quite easy to put together. I got the idea from ShopNotes #108. I changed mine slightly from their plans, but I basically started on friday, and if I hadn't had to have done all the garage reorg on saturday, they would have been done saturday. Just simple pine and doug fir, nothing fancy, that's for sure!
 
As a dedicated procrastinator, I've found there's nothing quite as motivating as a rapidly approaching deadline! :eek: :eek:
 
As a dedicated procrastinator, I've found there's nothing quite as motivating as a rapidly approaching deadline! :eek: :eek:

me two:D

:rofl::rofl: Story of my life :rofl:

me three:D

I know that your project with that wood will be fun and the final outcome will be beautiful ----- But I will say it again -- I really like your saw horses...

Too nice to be saw horses!! got me wanting to make some..

Paul

me four:D


Attaboy Brent 18 days you can easily get it done. Take a leaf our of Allens book. :);):thumb: Allen looks like you need to go on a road trip to visit Brent and show him how its done.
 
brent skip plane them first to get a better picture of what they are gonna look like..sometimes the rough side doesnt show the true picture..then make your final decision and go for the goal:)
 
Planer Sled

The next step on my project is to get the planks ready for glue up. Buy I've only got a 6 inch jointer, and I don't really relish the idea of manhandling these really heavy slabs on that. So I decided to make a planer sled and use that to help flatten these puppies out.

So, when making a Planer Sled, the first thing they say is that it has to be flat.

Well, I'm making a 7' long table, and my workbench is about 6 feet long and I decided to make an 8' long sled. What to do? Well, the first thing I did was to cut the 1/2" ply into 2 strips 13" long by 8' long. Then I took a couple of 2x4 and jointed them flat on one side on my jointer, and then planed them on edge to make sure they were flat and parallel.

Then I took my sawhorses and made sure they were 'co-planer' or level with each other. I used the flattened 2x4's and sawhorses to help me start on my glue up. Then I started the glue up.

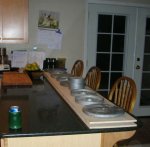
But I still needed a dead flat surface to make sure that this sled would be flat when it dried. Where could I possibly find a surface in my house 8 foot long dead flat that I could trust? Certainly nothing in the garage. But then Inspiration hit. How about that nice silestone countertop in the kitchen!
:thumb::thumb::thumb::thumb:

attachment.php


Good thing I have a very understanding wife (And that she went to bed very early tonight).
 

Attachments

  • planer_sled_01.jpg
    planer_sled_01.jpg
    85 KB · Views: 525
Last edited:
Well, the glue up appears to have been successful. The sled appears to be quite nice and flat. So tonight I make the rest of the bits for the sled.

On a seperate note, I really need to make a torsion box one of these days. It sure would come in handy to have a nice strong, light, dead flat surface to work on for assembly and things.
 
So, a pretty good day.

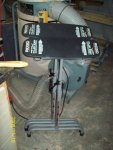
1) My wife had to go to town, so I convinced her to pick me up a couple of fliptop Ridgid work supports! :thumb:

attachment.php


2) Then, My friendly Brown driver stopped by with a little delivery from my favorite Canadian On Line store (Lee Valley) with a Veritas scraper plane, and some belts for my little 1x30 HF belt sander. Haven't played with the plane much yet, but I did use the leather belt with some polishing compound and put a serious hair shaving paper slicing thumbnail sticking sharpness on all my kitchen knives and pocket knives.

attachment.php


3) And I managed to finish up the planer sled. This is the FWW Keith Rust planer sled that our own Glenn Bradley has helped to popularize... Nothing left now but to cut some of my boards down to size and send them for a little planer sledding....

attachment.php
 

Attachments

  • 11_10_01.jpg
    11_10_01.jpg
    64.8 KB · Views: 253
  • 11_10_02.jpg
    11_10_02.jpg
    78.1 KB · Views: 254
  • 11_10_03.jpg
    11_10_03.jpg
    77.6 KB · Views: 251
Well, Been plugging away at it in the evenings last week and a bit more today.

What I've learned so far.

  1. 8/4 Rock Maple is heavy, especially when dealing with 10" wide 7' long pieces.
  2. Planer blades dull really fast when you try and hog too much off and the planer 'stalls'
  3. Jointing 7' long boards on a 6" jointer is a bit of a challenge.
  4. Changing blades on my new dewalt planer is actually pretty darn easy.

So at this point, I have the boards flattened as best as I can with my planer sled. It worked pretty good. I think I will probably make a smaller one for shorter projects at some point. I've also planed them down to 1 1/2 inches thick. Sure did generate a good amount of shavings from all that planing.

I've also got the boards 'rough jointed'. That means I've run them over my jointer and then ripped a parallel face on the table saw. They aren't perfect though, so more work needs to be done. I'm tempted to try and use my #7 jointer plane to do the job. I'll give it a shot tomorrow.

So, Next steps are:

  1. Keep playing with the boards till I find the most pleasing arrangement.
  2. Work at Jointing the boards, whether its with a hand plane or a machine... We'll see how it all works out.
  3. Glue it up!

attachment.php
 

Attachments

  • diningtable_03.jpg
    diningtable_03.jpg
    100.6 KB · Views: 232
Brent,
Don't know on how you want to glue up the top but I'd glue 2 board up first and 2 more, let it dry then glue the third board to one of the glue ups then when thats dry glue the two remaining pieces together. This will make it easier to keep them aligned.
 
Top