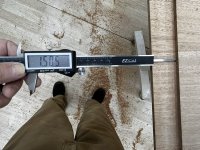
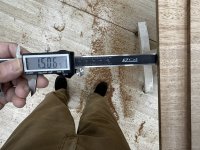
Failed Finish - and the rebuild

One small caveat.

I haven't specifically used EM8000 but if it's like the other water white/water clear finishes I've used. When they say "Non-Yellowing/Water White", what they mean it that it really really really does NOT color the wood or pop the grain AT ALL. Which can be a bit of a surprise if you're used to the coloring you get with oil based finishes...
Em8000cv has a very slight amber tint. Not as much as most solvent-based finishes, but it's still noticeable. As always, do a test piece first.
 
Looking at the amount of time I will spend sanding this back, I'm facing a few issues.
I used dye for color. Dye soaks in deep so sanding will likely leave a somewhat blotchy surface that will pose many problems when I go to apply new dye.
The glue creep will likely come back.
As much sanding as this will take will result in an uneven surface. This is because I wont be able to control myself sanding harder and longer where the color is deepest.
It will take a lot of time.

So, I'm seriously considering just remaking the top. Assuming waste it is around 24 bf of 5/4 mahogany. I think milling and glue up would take about the same time as all that sanding. I can use a different glue and in the end have a better product.

What say you?

I vote for this option. Although, you could drill a hole at each end inside the ends and cut it out with a jig saw and segment an opposing color in. Yeah I know, can't get away from cutting it out of the middle. I'll now go back to my corner!
 
I vote for this option. Although, you could drill a hole at each end inside the ends and cut it out with a jig saw and segment an opposing color in. Yeah I know, can't get away from cutting it out of the middle. I'll now go back to my corner!
Confucius say - The honey of humor makes wise council more pleasing to the ear.
 
Getting ready to glue up the new top. A little research confirmed what has been offered here - plastic resin glue (like Weldwood) is a good bet to avoid glue creep. However, I also have found a number of articles noting that hide glue is also a good defense. Since I already have hide glue on hand, and I like the long open time, I'm considering using that.

Any dissenting voices?
 
I like hide glue for a lot of things… I’m not sure I’d use it for a table top. It’s probably fine but weldwood would be more resistant to abuse. I guess I’m on the fence with this one, if it was a table top for me I’d probably use it..
 
Rebuilding the top.

Although I like breadboard ends I've always been challenged by them. Among the reasons for this is the cutting of the tenon - specifically, how to insure that the top and bottom shoulder line up exactly. For me it has always been a matter of the reference point. I can carefully measure and use the finest point pencil or marking knife to mark my lines, but lining up the fence to those lines is still a crapshoot. A little blur in your near vision, a little parallax, a shadow... Before you know it one side has a gap. :bang: :bang:

This has probably been figured out by many and I'm just terribly late to the knowledge, but if you can reference off the end of the table top you don't need to have 20/20 vision and a headlamp. :doh:

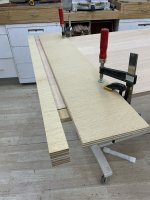
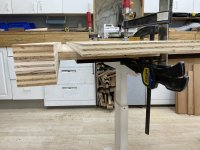
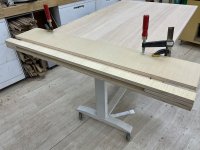
Hence this jig. Thrown together with some scrap ply it seats tight to the edge of the table top insuring that both top and bottom cuts are exactly aligned. In fact, I removed and reset the jig multiple times for each cut to check the depth of cut. Perfect alignment each time.

One thing I will change is that I did get some deflection that caused the tip of the tenon to be a bit thinner than at the shoulder - but, since I planned to mill it a bit thicker then plane it to fit this was not a major issue. Some additional bracing between the fence and the stop should cure this.

Essentially just a fence and a stop.
bbjig1.JPEGbbjig3.JPEGbbjig4.JPEG

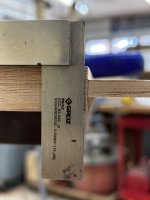
A nice clean tenon
bbjig5.JPEG

Pretty close!
bbjig6.JPEGbbjig7.JPEGbbjig8.JPEG
 
One bit of advice is to follow the directions when using the Cascamite. They call for accurate measurements of both the glue powder and the water. I used stainless steel measuring spoons to accurately measure out the glue powder and water. I also made sure I used a level tablespoon, (not heaped up) and as close as possible to a level tablespoon of water. I did not use water straight from the tap but kept a plastic bottle of water at room temperature. I found that adding the water to the powdered glue worked better than the other way around. I used craft sticks for mixing.

When you are mixing the glue and the water at first it does not look like it is going to mix but just keep mixing. You'll be tempted to add more water but don't. All of a sudden the powder goes into solution and turns into a spreadable cream. I found disposable acid brushes were great for spreading the glue.
 
Top